I don't know about you but I'm over fighting crowds at the store, looking for the elusive, perfect gift for those left on my list. Or maybe your pocket book is screaming at you and you need to find another way to finish your shopping. While perusing the web I have come across many cute do-it-yourself gift ideas. Here are some of the ideas I've found...
1. Earring Organizer for the young, or older, lady on your list
2. Homemade Food Gift Ideas
3. Resin Window that you can personalize or change to fit your recipient
4. Handpainted Christmas Stockings or Ornaments
5. Make a gift out of your old Mason Jars
6. Cute little Magnet Board
7. Several age-specific gift ideas
8. Super cute 'I Spy' book, using your kids toys!
So there you are. Several options to finish up your Christmas list. Not only will it save you some cash, but those on your list will love the fact that you took the time to make their gift yourself! So go turn on some Christmas music and get crafty!
Brandi
Tuesday, December 13, 2011

Tuesday, December 6, 2011
Sheet Music Dresser & Veneer Repair
Today's post will be about the sheet music dresser I finished recently.

I have to credit the original source, Miss Mustard Seed, with the idea for the sheet music dresser. Love her stuff. The concept is really quite simple, however, in this case I was working with a veneer dresser that was in pretty bad shape. So first I had to deal with the veneer, which could be a post in itself! The veneer on the top of the dresser was partially torn off already but the remaining veneer wasn't budging. So I tried out a trick I heard about recently, using an iron. I simply put an old cloth over a small area and held the iron on there for 20-30 seconds. Then use a small chisel to pry it up. It took a little while but it worked wonderfully (and I actually taught my mom something for once, instead of vice versa!). Now, the top still wasn't in what I would call "paintable" condition, so mod podge it is!
First though, I needed to address the sides.The veneer was coming up on the bottom edges but it wasn't gone completely. I glued it (with wood glue) and clamped it down overnight. I then used wood putty to fill in any small areas that were missing. The putty also helps to glue it down even more. Let it all dry (thicker areas require longer drying time) and then sand. After that's complete, wipe it down well, and on to the painting. I used my go to paint color - Heirloom White - on this dresser. Again, let it dry. I chose to distress the paint on the edges and corners using a medium grit sandpaper, followed by sanding the whole piece with a low grit paper (Note: low grit is a high number paper and vice versa) just to smooth any small bumps or roughness.

Finally, the sheet music application. While I wish that I could just jump right to this part (ie. results!), all the prep work is absolutely necessary to end up with a quality piece. Go through your sheet music and pick out the pieces that you want. I really wanted to mix up the colors a little bit, using light and dark yellowing next to each other. Once you have laid it out and determined a plan, start mod podging! Cover the back of a piece with mod podge and place on your surface. You can cut the edges to fit perfectly before you start or leave a little overhang and cut it off once all your pieces are on. Make sure to use a sharp razor blade if you do it this way, otherwise you may rip your paper. Cover and cut all areas that you want sheet music on, and then go back and cover the tops of the sheet music with mod podge, making sure to get the edges well so that they do not come up. Allow to dry several hours or overnight. Note: when the mod podge is wet the surface will have some bubbles. Don't fret, they will go away once it dries.
Next, add some age. After the first layer of mod podge I used a light brown glaze (Ralph Lauren Tea Stained) to antique it a little more. While I typically use a dry brush, in this case I used a cloth and just wiped a small amount over the entire dresser. Allow to dry. The next day add another layer of mod podge over the sheet music and let dry. Finally, cover the entire dresser with a protective coat of polyurethane (or 3).

That's it folks! It take a little patience but the end result is beautiful, at least I think so!
I hope that it inspires you to do a mod podge project of your own.
Brandi

I have to credit the original source, Miss Mustard Seed, with the idea for the sheet music dresser. Love her stuff. The concept is really quite simple, however, in this case I was working with a veneer dresser that was in pretty bad shape. So first I had to deal with the veneer, which could be a post in itself! The veneer on the top of the dresser was partially torn off already but the remaining veneer wasn't budging. So I tried out a trick I heard about recently, using an iron. I simply put an old cloth over a small area and held the iron on there for 20-30 seconds. Then use a small chisel to pry it up. It took a little while but it worked wonderfully (and I actually taught my mom something for once, instead of vice versa!). Now, the top still wasn't in what I would call "paintable" condition, so mod podge it is!
First though, I needed to address the sides.The veneer was coming up on the bottom edges but it wasn't gone completely. I glued it (with wood glue) and clamped it down overnight. I then used wood putty to fill in any small areas that were missing. The putty also helps to glue it down even more. Let it all dry (thicker areas require longer drying time) and then sand. After that's complete, wipe it down well, and on to the painting. I used my go to paint color - Heirloom White - on this dresser. Again, let it dry. I chose to distress the paint on the edges and corners using a medium grit sandpaper, followed by sanding the whole piece with a low grit paper (Note: low grit is a high number paper and vice versa) just to smooth any small bumps or roughness.

Finally, the sheet music application. While I wish that I could just jump right to this part (ie. results!), all the prep work is absolutely necessary to end up with a quality piece. Go through your sheet music and pick out the pieces that you want. I really wanted to mix up the colors a little bit, using light and dark yellowing next to each other. Once you have laid it out and determined a plan, start mod podging! Cover the back of a piece with mod podge and place on your surface. You can cut the edges to fit perfectly before you start or leave a little overhang and cut it off once all your pieces are on. Make sure to use a sharp razor blade if you do it this way, otherwise you may rip your paper. Cover and cut all areas that you want sheet music on, and then go back and cover the tops of the sheet music with mod podge, making sure to get the edges well so that they do not come up. Allow to dry several hours or overnight. Note: when the mod podge is wet the surface will have some bubbles. Don't fret, they will go away once it dries.
Next, add some age. After the first layer of mod podge I used a light brown glaze (Ralph Lauren Tea Stained) to antique it a little more. While I typically use a dry brush, in this case I used a cloth and just wiped a small amount over the entire dresser. Allow to dry. The next day add another layer of mod podge over the sheet music and let dry. Finally, cover the entire dresser with a protective coat of polyurethane (or 3).

That's it folks! It take a little patience but the end result is beautiful, at least I think so!
I hope that it inspires you to do a mod podge project of your own.
Brandi
Saturday, December 3, 2011
Hand Painted Detail
So I must say, I'm having a fabulous time at my first show. It's so gratifying when others like your stuff. It would be even more fabulous if I could sell some of the large furniture but I think it will come with time. As of now, I'm just happy to get my name out there and to meet so many fabulous people.


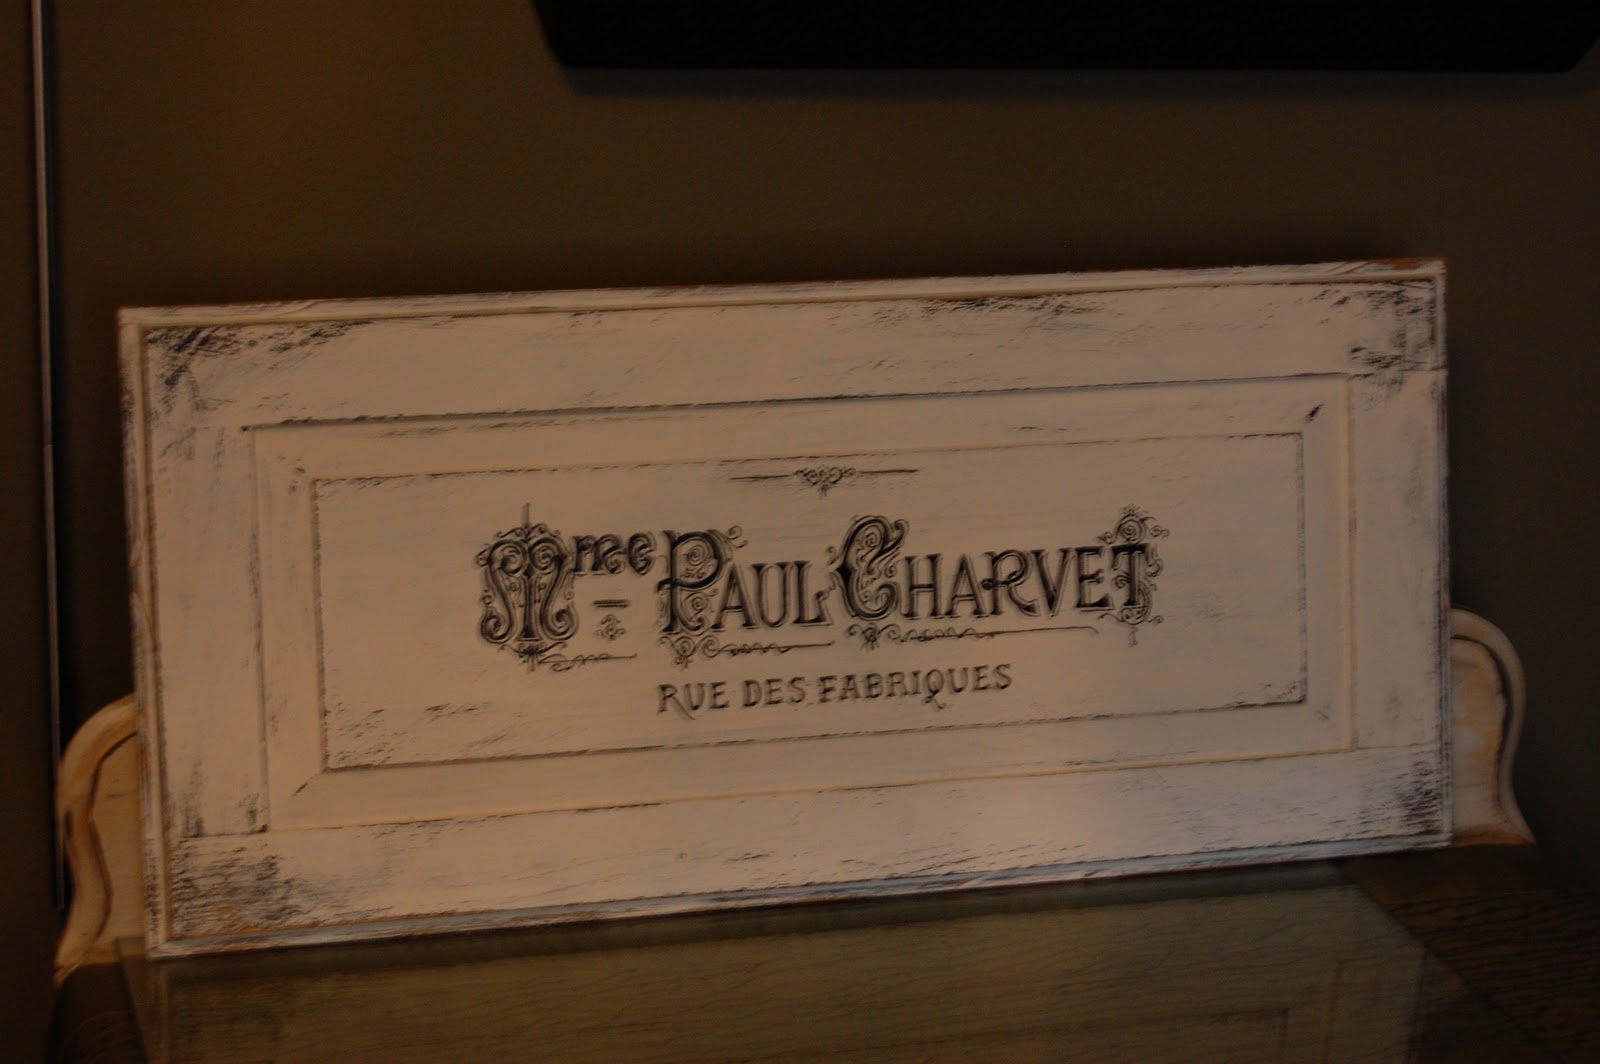
I have several signs and painted furniture pieces at the show and it has been interesting to hear the surprise when people learn that they are hand painted. First, I need to clear up that I typically get the graphic from somewhere in blogland (mostly The Graphics Fairy because she is amazing and it's free). I then use my overhead projector (old school, I know) to project the image on my surface of choice. From there it is all hand done. Tedious? Yes. But I love it and I just get so much more satisfaction out of it than a stick on image (although I've seen many nice ones).


So, if you were wondering.... it is hand painted... and I probably cursed and mumbled while painting it, but when it's through I (nearly) always think it was worth it. I hope that others appreciate it too.
I hope that you enjoy the rest of your weekend,
Brandi

Chair Seat
I have several signs and painted furniture pieces at the show and it has been interesting to hear the surprise when people learn that they are hand painted. First, I need to clear up that I typically get the graphic from somewhere in blogland (mostly The Graphics Fairy because she is amazing and it's free). I then use my overhead projector (old school, I know) to project the image on my surface of choice. From there it is all hand done. Tedious? Yes. But I love it and I just get so much more satisfaction out of it than a stick on image (although I've seen many nice ones).


So, if you were wondering.... it is hand painted... and I probably cursed and mumbled while painting it, but when it's through I (nearly) always think it was worth it. I hope that others appreciate it too.
I hope that you enjoy the rest of your weekend,
Brandi
Friday, December 2, 2011
A farm house table, sheet music dresser & my first show
If this is your first time here... welcome!
It's been a whirlwind week and it isn't over yet. Not that I'm complaining!
I'm SO excited for my first show this weekend at the Urban Finds Christmas Extravaganza! First a bit on that...
Location Urban Finds (Lotus Event Center)
2134 East Grand Ave
Des Moines, Iowa
Date/Time: This evening is invited guests only (that's YOU!)- Friday, December 2nd 6-8pm
Friday night is not open to the general public so you can get the best finds before everyone else!
Public Hours: Saturday 12/3 & Sunday 12/4 9am-4pm
Admission: Free. However, we are accepting cleaning supplies or cash donations for the Hawthorne House
(a local women/children's shelter).
Here's a sneak peek of my booth:
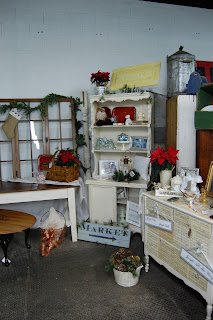


I hope you can join us! I've been scoping out the goods of the other vendors and there are definitely some good finds!
So if you notice in the above pictures, I have a sheet music dresser (inspired by Miss Mustard Seed), a striped Duncan Phyfe table, as well as a farm house table. I'm so proud to say that my mom and I built the farm house table ourselves! My very first build project...using real tools.... I've always been a bitscared intimidated by the big saws/power tools so this one was a big deal to me. Plus, it was fun building it with my mom. The original building plan came from Ana White Homemaker. She has some fantastic things over there. Definitely check her blog out!
Back to the point, sorry. While I don't have time to post tutorials on those things today (still scrambling with the last minute projects for the show!) I promise to post more specific details on those soon!
I promise to be more consistent with my posts after this show so stay tuned...
Brandi
It's been a whirlwind week and it isn't over yet. Not that I'm complaining!
I'm SO excited for my first show this weekend at the Urban Finds Christmas Extravaganza! First a bit on that...
Location Urban Finds (Lotus Event Center)
2134 East Grand Ave
Des Moines, Iowa
Date/Time: This evening is invited guests only (that's YOU!)- Friday, December 2nd 6-8pm
Friday night is not open to the general public so you can get the best finds before everyone else!
Public Hours: Saturday 12/3 & Sunday 12/4 9am-4pm
Admission: Free. However, we are accepting cleaning supplies or cash donations for the Hawthorne House
(a local women/children's shelter).
Here's a sneak peek of my booth:


I hope you can join us! I've been scoping out the goods of the other vendors and there are definitely some good finds!
So if you notice in the above pictures, I have a sheet music dresser (inspired by Miss Mustard Seed), a striped Duncan Phyfe table, as well as a farm house table. I'm so proud to say that my mom and I built the farm house table ourselves! My very first build project...using real tools.... I've always been a bit
Back to the point, sorry. While I don't have time to post tutorials on those things today (still scrambling with the last minute projects for the show!) I promise to post more specific details on those soon!
I promise to be more consistent with my posts after this show so stay tuned...
Brandi
Tuesday, November 22, 2011
Grain Sack Pillow
Hello and Happy Thanksgiving!
I AM still alive, believe it or not. So, in my previous post I talked about doing my first show and mentioned that I wasn't very stressed or worried about getting things done. Well, that changed in a hurry! About the middle of last week I went into panic mode, other wise known as "don't go near mom/wife" mode. Ha! In all seriousness, I'm feeling pretty good now but still have a ways to go. Along the way I have also realized that what I intended to be a once a day, or every few days blog, hasn't really worked out that way. I'm still trying to decide what is appropriate and fitting for my life versus what will keep people interested and coming back. It's all such a balancing act and I certainly don't have it mastered yet.
On to the good stuff. I have been working on several of the key pieces for my booth which include a farm house table (built from scratch), a sheet music dresser and a hutch. I will definitely be posting those soon! In between the large projects I have been attempting to get all the "chum" together. (Chum=all the accessories to "pretty up" the booth. My husband and I were watching a reality show on flea markets once and that's what they called it. I had never heard it called that before but I thought it was funny.) Today's post is part of my chum.

Last year I bought a few grain sacks at a sale but wasn't sure what to do with them. Last week while digging through all of mycrap valuable finds, I caught them out of the corner of my eye and decided they would be cute pillows! This one is from a place in Independence, Iowa ~ pretty cool. The letters are really faded so I apologize, the pictures stink. In person it is more legible.
On to the how to...
*Choose a pillow form. I bought a 14 x 14 pillow form at Joann's Fabric.

*Then cut the grain sack (it was pillow case shaped) to remove the back half. Laying the sack with letters up, measure the middle (side to side & up and down) and centered it on the pillow form (put the sack on top of the pillow). From there, leave an extra 1 inch on each side so you have room to sew. You can always trim excess later.

*Cut the sack to the size you need (allowing the 1 extra inch). You will also want to cut the same size piece for the backside of the pillow (we used the plain, backside of the grain sack).
*Important: flip the two grain sack pieces over to their backside (upside down, facing each other) and make sure the edges (of the 2 pieces) are evenly lined up. The picture/words should be on the inside (inside out) when you sew it. You only want to sew around three sides. Otherwise you will have sewn it shut and can no longer stuff your pillow in..swear words will follow...yada, yada, yada.

*Sew around the three sides (my wonderful seamstress mother did it, although this is a really easy sew job), leaving the bottom or top open. Turn the grain sack "shell" right side up-now it should look like the pillow you want (before the pillow is in it). Stuff your pillow in, and then hand sew the remaining edge shut. Hand sewing it will give the cleanest final look.
In the case of this pillow, we thought it would be cute to have the four corners look a little different. So we cut the corners wider initially so that a long tail was left, and then when we (by 'we,' I mean my mom) sewed it we didn't sew the corners shut. After putting the pillow form in we tied the four corners in a knot. My mom did the planning on that piece of it, so I can't take credit. As I may have mentioned before, I was in panic mode and not interested in such details, but thank goodness she was.

That's it! Cute little pillow with minimal work.
Looking back, this was rather long winded. I apologize for that but what did you expect when I haven't blogged for a week?
Have a great turkey day with your family!
Until next time....
I AM still alive, believe it or not. So, in my previous post I talked about doing my first show and mentioned that I wasn't very stressed or worried about getting things done. Well, that changed in a hurry! About the middle of last week I went into panic mode, other wise known as "don't go near mom/wife" mode. Ha! In all seriousness, I'm feeling pretty good now but still have a ways to go. Along the way I have also realized that what I intended to be a once a day, or every few days blog, hasn't really worked out that way. I'm still trying to decide what is appropriate and fitting for my life versus what will keep people interested and coming back. It's all such a balancing act and I certainly don't have it mastered yet.
On to the good stuff. I have been working on several of the key pieces for my booth which include a farm house table (built from scratch), a sheet music dresser and a hutch. I will definitely be posting those soon! In between the large projects I have been attempting to get all the "chum" together. (Chum=all the accessories to "pretty up" the booth. My husband and I were watching a reality show on flea markets once and that's what they called it. I had never heard it called that before but I thought it was funny.) Today's post is part of my chum.

Last year I bought a few grain sacks at a sale but wasn't sure what to do with them. Last week while digging through all of my
On to the how to...
*Choose a pillow form. I bought a 14 x 14 pillow form at Joann's Fabric.

*Then cut the grain sack (it was pillow case shaped) to remove the back half. Laying the sack with letters up, measure the middle (side to side & up and down) and centered it on the pillow form (put the sack on top of the pillow). From there, leave an extra 1 inch on each side so you have room to sew. You can always trim excess later.

*Cut the sack to the size you need (allowing the 1 extra inch). You will also want to cut the same size piece for the backside of the pillow (we used the plain, backside of the grain sack).
*Important: flip the two grain sack pieces over to their backside (upside down, facing each other) and make sure the edges (of the 2 pieces) are evenly lined up. The picture/words should be on the inside (inside out) when you sew it. You only want to sew around three sides. Otherwise you will have sewn it shut and can no longer stuff your pillow in..swear words will follow...yada, yada, yada.

*Sew around the three sides (my wonderful seamstress mother did it, although this is a really easy sew job), leaving the bottom or top open. Turn the grain sack "shell" right side up-now it should look like the pillow you want (before the pillow is in it). Stuff your pillow in, and then hand sew the remaining edge shut. Hand sewing it will give the cleanest final look.
In the case of this pillow, we thought it would be cute to have the four corners look a little different. So we cut the corners wider initially so that a long tail was left, and then when we (by 'we,' I mean my mom) sewed it we didn't sew the corners shut. After putting the pillow form in we tied the four corners in a knot. My mom did the planning on that piece of it, so I can't take credit. As I may have mentioned before, I was in panic mode and not interested in such details, but thank goodness she was.

That's it! Cute little pillow with minimal work.
Looking back, this was rather long winded. I apologize for that but what did you expect when I haven't blogged for a week?
Have a great turkey day with your family!
Until next time....
Subscribe to:
Posts (Atom)