Showing posts with label Tools and Techniques. Show all posts
Thursday, December 22, 2011
Crayon Monogram Tutorial
Hi! Happy Holidays!
Today I thought I would share a tutorial on the cute monogram crayola letter I did for my daughters' teachers. I first saw a picture of it on Pinterest and I'm proud to say that I actually DID one of the things I pinned. Now typically I just pin and admire, but this time I completed one of the cute little projects. The original Crayola monogram came from here. Great idea, but not a lot of instruction.
The pictures are not the greatest...it was dark..and late...the night before Christmas break (ie. they had to take them to school the next morning).
Supplies Needed (for 1 monogram):
- 2 packs of crayons (24 ct so you can get several reds, oranges, etc..)
- 8 x 10 or 8 1/2 x 11 frame (with stand, if you choose)
- Scrapbook paper
- Small letter stamps & ink pad
- Hot glue gun & knife or boxcutter
On to the tutorial...
I bought two frames (on sale, of course) from Michael's, as well as some creamy white scrapbook paper. I removed the glass and picture that came in the frame. Since the crayons are rather heavy I needed the paper to be heavy as well. So when looking at the frame, I decided to mod podge the scrapbook paper to the cardboard back (the piece that has the stand). It wasn't intentional at the time but it was nice to get a frame with a stand. That way they can choose to hang it or set it on a desk or table using the stand.
I attempted to print out the initial that I needed on a piece of paper but I couldn't get the font wide enough to look right so I got frustrated and gave up on that. Instead I laid out a row of crayons using the rainbow order (ROYGBV)..you know, 'roy-g-biv' like we learned in school, the length I thought looked appropriate. You can see the 'R' I printed out on the paper underneath but I didn't follow that because it was too narrow as I mentioned.
As you can see in the picture, I made the first two and last two crayons go out to the left a bit more. Now, how to cut the crayons. Put your patience hat on for this one. I used the picture that I had from pinterest as a guide when I decided where to cut. The 1st and 13th (in my case) crayon are full length, the 2nd and 3rd from the top and bottom taper in, and the rest are all the same length (they were cut right after the 'O' in Crayola). This side of the letter is rather easy to cut because you cut straight lines. Just score around the whole crayon and then snap off. Easy peasy. Make sure to keep the broken off ends near by. I found it easiest to keep them lined up off to the right so the order remained the same.
Now for the right, rounded side of the letter (depending on the letter you are doing). This was a bit of an experiment for me. First you will want to align the points of the crayons how you want them (remember, the extra length will be cut off of the left side of the crayon-you keep the tips for this part of the letter). The rounded part of the letter starts at the top and tapers outwards until you reach the middle of the rounded 'R' section, then tapers back in. I hope that makes sense. I then held them in place the drew the "inside" of the rounded 'R' where I wanted to cut them. Note: you will cut them at an angle; angled up and to the left on the top section and down and to the left on the bottom section (see first picture). Do the same with the lower, right section of the 'R'.
Now for the gluing. Ugh, the gluing. I started by putting a little hot glue on the side of the 2nd crayon and gluing to the first. Yep, one by one, I glued them together. You can always "eye ball it" or lightly mark where you want the first crayon on your scrapbook paper but I'm too anal to do that. So I glued all of the crayons together (on one side) and then carefully glued the whole thing on the paper. The first time (first teacher's) I gently flipped it over, applied hot glue to the back of the monogram, then flipped it onto the paper. Well that was frustrating. Hot glue is unforgiving unless you want to rip it off the paper and readjust (ripping the paper too). So you had better get it right the first time. I did ok-not great, but ok. The 2nd time, in my semi-delirious state at this point, I placed the monogram (before applying glue) where I wanted it and then "outlined" it in sticky notes.
I then removed the monogram, hot glued between the sticky notes right onto the paper and then placed the monogram on it. That worked better but still not great. You needn't ask..I was definitely thinking "there must be a better way (but I'm too tired to think of it)."
Ok, hard parts over. Now just stamp, write, paint,... a nice little saying on it. Personally, I picked up these tiny alphabet stamps (at an earlier date) in the craft aisle at Wal-mart for a $1 per set. I just knew they would come in handy!
Use whatever message you like, put it in frame and voila, finished!
I'm fairly happy with the end product. I'm a little obsessive compulsive (read: anal) so I was a little disappointed with the round parts of my letters, however, the second time I did it (the "P") went a little better than the first. Live and learn I suppose.
Well, I hope their teachers like them and that you enjoy them too.
Until next time,
Brandi
Tuesday, December 6, 2011
Sheet Music Dresser & Veneer Repair
Today's post will be about the sheet music dresser I finished recently.
I have to credit the original source, Miss Mustard Seed, with the idea for the sheet music dresser. Love her stuff. The concept is really quite simple, however, in this case I was working with a veneer dresser that was in pretty bad shape. So first I had to deal with the veneer, which could be a post in itself! The veneer on the top of the dresser was partially torn off already but the remaining veneer wasn't budging. So I tried out a trick I heard about recently, using an iron. I simply put an old cloth over a small area and held the iron on there for 20-30 seconds. Then use a small chisel to pry it up. It took a little while but it worked wonderfully (and I actually taught my mom something for once, instead of vice versa!). Now, the top still wasn't in what I would call "paintable" condition, so mod podge it is!
First though, I needed to address the sides.The veneer was coming up on the bottom edges but it wasn't gone completely. I glued it (with wood glue) and clamped it down overnight. I then used wood putty to fill in any small areas that were missing. The putty also helps to glue it down even more. Let it all dry (thicker areas require longer drying time) and then sand. After that's complete, wipe it down well, and on to the painting. I used my go to paint color - Heirloom White - on this dresser. Again, let it dry. I chose to distress the paint on the edges and corners using a medium grit sandpaper, followed by sanding the whole piece with a low grit paper (Note: low grit is a high number paper and vice versa) just to smooth any small bumps or roughness.
Finally, the sheet music application. While I wish that I could just jump right to this part (ie. results!), all the prep work is absolutely necessary to end up with a quality piece. Go through your sheet music and pick out the pieces that you want. I really wanted to mix up the colors a little bit, using light and dark yellowing next to each other. Once you have laid it out and determined a plan, start mod podging! Cover the back of a piece with mod podge and place on your surface. You can cut the edges to fit perfectly before you start or leave a little overhang and cut it off once all your pieces are on. Make sure to use a sharp razor blade if you do it this way, otherwise you may rip your paper. Cover and cut all areas that you want sheet music on, and then go back and cover the tops of the sheet music with mod podge, making sure to get the edges well so that they do not come up. Allow to dry several hours or overnight. Note: when the mod podge is wet the surface will have some bubbles. Don't fret, they will go away once it dries.
Next, add some age. After the first layer of mod podge I used a light brown glaze (Ralph Lauren Tea Stained) to antique it a little more. While I typically use a dry brush, in this case I used a cloth and just wiped a small amount over the entire dresser. Allow to dry. The next day add another layer of mod podge over the sheet music and let dry. Finally, cover the entire dresser with a protective coat of polyurethane (or 3).
That's it folks! It take a little patience but the end result is beautiful, at least I think so!
I hope that it inspires you to do a mod podge project of your own.
Brandi
I have to credit the original source, Miss Mustard Seed, with the idea for the sheet music dresser. Love her stuff. The concept is really quite simple, however, in this case I was working with a veneer dresser that was in pretty bad shape. So first I had to deal with the veneer, which could be a post in itself! The veneer on the top of the dresser was partially torn off already but the remaining veneer wasn't budging. So I tried out a trick I heard about recently, using an iron. I simply put an old cloth over a small area and held the iron on there for 20-30 seconds. Then use a small chisel to pry it up. It took a little while but it worked wonderfully (and I actually taught my mom something for once, instead of vice versa!). Now, the top still wasn't in what I would call "paintable" condition, so mod podge it is!
First though, I needed to address the sides.The veneer was coming up on the bottom edges but it wasn't gone completely. I glued it (with wood glue) and clamped it down overnight. I then used wood putty to fill in any small areas that were missing. The putty also helps to glue it down even more. Let it all dry (thicker areas require longer drying time) and then sand. After that's complete, wipe it down well, and on to the painting. I used my go to paint color - Heirloom White - on this dresser. Again, let it dry. I chose to distress the paint on the edges and corners using a medium grit sandpaper, followed by sanding the whole piece with a low grit paper (Note: low grit is a high number paper and vice versa) just to smooth any small bumps or roughness.
Finally, the sheet music application. While I wish that I could just jump right to this part (ie. results!), all the prep work is absolutely necessary to end up with a quality piece. Go through your sheet music and pick out the pieces that you want. I really wanted to mix up the colors a little bit, using light and dark yellowing next to each other. Once you have laid it out and determined a plan, start mod podging! Cover the back of a piece with mod podge and place on your surface. You can cut the edges to fit perfectly before you start or leave a little overhang and cut it off once all your pieces are on. Make sure to use a sharp razor blade if you do it this way, otherwise you may rip your paper. Cover and cut all areas that you want sheet music on, and then go back and cover the tops of the sheet music with mod podge, making sure to get the edges well so that they do not come up. Allow to dry several hours or overnight. Note: when the mod podge is wet the surface will have some bubbles. Don't fret, they will go away once it dries.
Next, add some age. After the first layer of mod podge I used a light brown glaze (Ralph Lauren Tea Stained) to antique it a little more. While I typically use a dry brush, in this case I used a cloth and just wiped a small amount over the entire dresser. Allow to dry. The next day add another layer of mod podge over the sheet music and let dry. Finally, cover the entire dresser with a protective coat of polyurethane (or 3).
That's it folks! It take a little patience but the end result is beautiful, at least I think so!
I hope that it inspires you to do a mod podge project of your own.
Brandi
Saturday, December 3, 2011
Hand Painted Detail
So I must say, I'm having a fabulous time at my first show. It's so gratifying when others like your stuff. It would be even more fabulous if I could sell some of the large furniture but I think it will come with time. As of now, I'm just happy to get my name out there and to meet so many fabulous people.
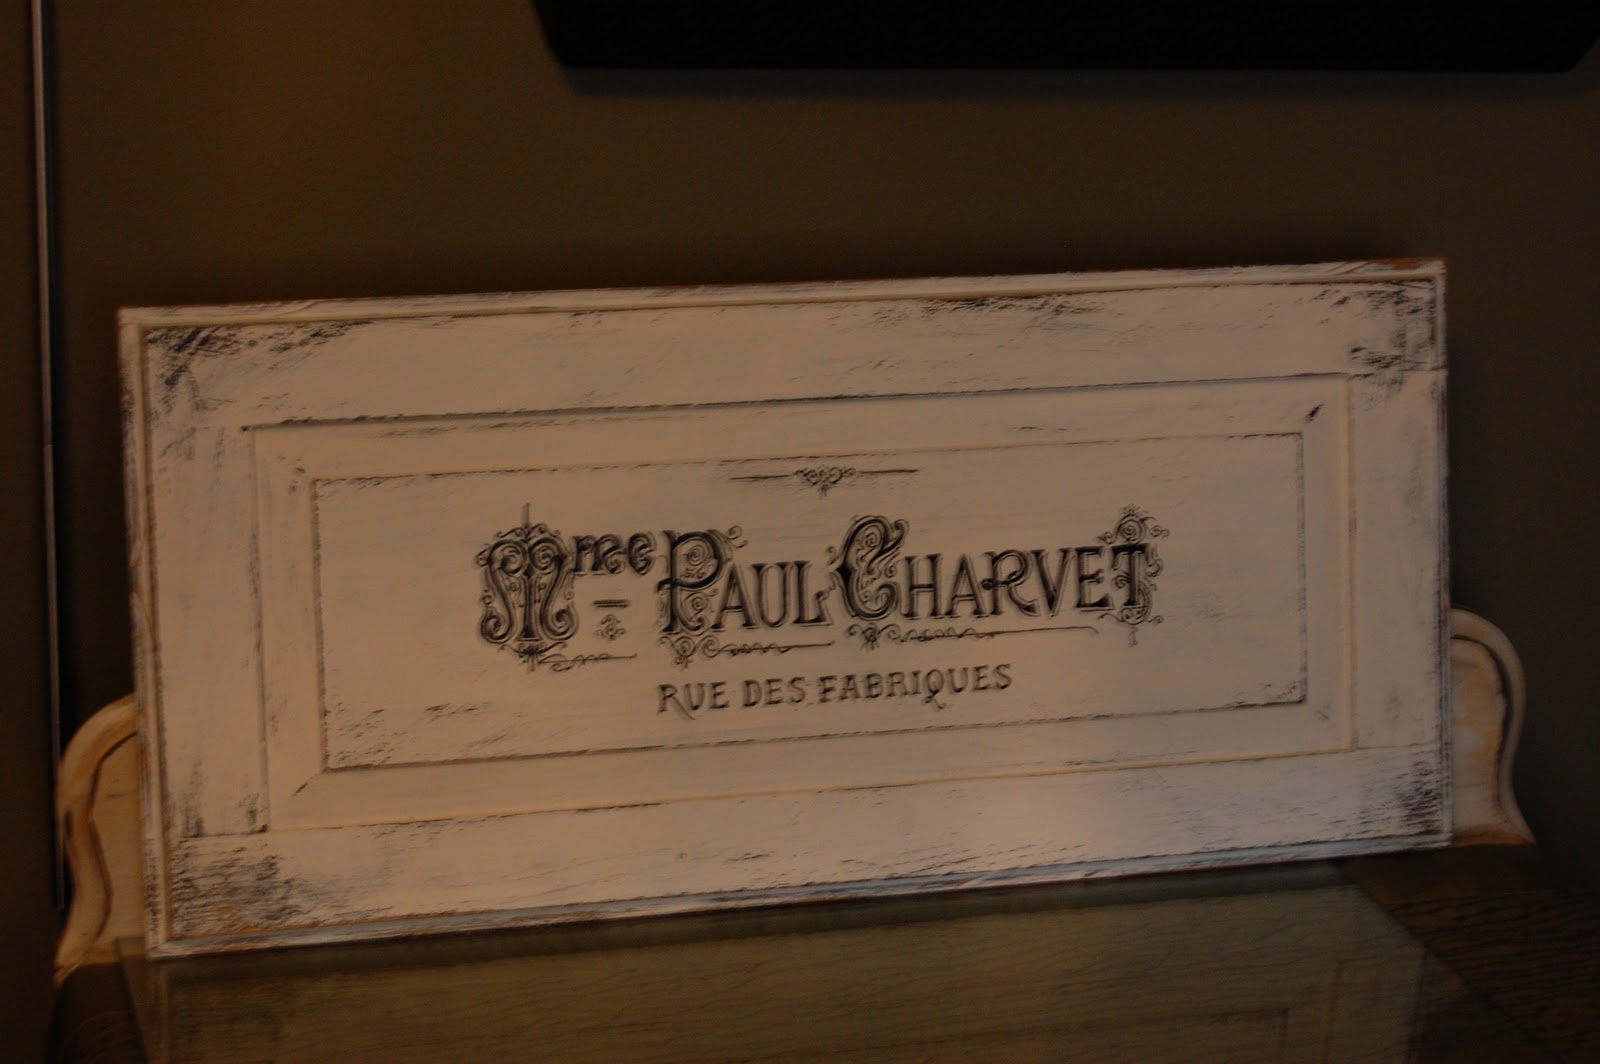
I have several signs and painted furniture pieces at the show and it has been interesting to hear the surprise when people learn that they are hand painted. First, I need to clear up that I typically get the graphic from somewhere in blogland (mostly The Graphics Fairy because she is amazing and it's free). I then use my overhead projector (old school, I know) to project the image on my surface of choice. From there it is all hand done. Tedious? Yes. But I love it and I just get so much more satisfaction out of it than a stick on image (although I've seen many nice ones).
So, if you were wondering.... it is hand painted... and I probably cursed and mumbled while painting it, but when it's through I (nearly) always think it was worth it. I hope that others appreciate it too.
I hope that you enjoy the rest of your weekend,
Brandi
Chair Seat
I have several signs and painted furniture pieces at the show and it has been interesting to hear the surprise when people learn that they are hand painted. First, I need to clear up that I typically get the graphic from somewhere in blogland (mostly The Graphics Fairy because she is amazing and it's free). I then use my overhead projector (old school, I know) to project the image on my surface of choice. From there it is all hand done. Tedious? Yes. But I love it and I just get so much more satisfaction out of it than a stick on image (although I've seen many nice ones).
So, if you were wondering.... it is hand painted... and I probably cursed and mumbled while painting it, but when it's through I (nearly) always think it was worth it. I hope that others appreciate it too.
I hope that you enjoy the rest of your weekend,
Brandi
Tuesday, November 8, 2011
Photography & Photoshop Learning Curve
When I first started painting furniture I had no idea that it would lead to a blog, and then that the blog would necessitate learning about photography, cameras, picture editing,.... the list goes on. Now, don't get me wrong, I LOVE to learn new things but a little tidbit about me - I have this need to know everything right now. For some reason my mind does not accept that there is a learning curve. Nope- just the requirement to be an expert. At everything. Not so much that I know more than others, just that I have to be perfect at it before I think it's good enough. So how's that workin' out? Well... not so good, but I'm working on it.
We celebrated my middle daughter's 8th birthday last weekend and of course I took some pictures. I thought I would share some of the 'before' photoshop pictures and the 'after.' I still have much to learn. I don't quite have the eye for it yet. I can tell when an original picture is too dark but I still struggle with how much to lighten it, when to soften, when to sharpen, etc.. (Just a note so you don't think I'm a horrible & crazy parent: we usually do not allow them to wear makeup like this but we had a "Rocker Girl" themed party where they got their hair, nails and makeup done)
My youngest insisting on trying to do her own makeup.
So those are some of my attempts at Photoshop. I'm looking to purchase a new camera as well but have a lot more research to do before making the move. I want something that I can grow into (so I don't want to buy another one a year from now), but don't want to overbuy. I'll keep you posted on what I decide.
Have a great week, and feel free to share your photography successes, mishaps or any other little tidbits you would like.
We celebrated my middle daughter's 8th birthday last weekend and of course I took some pictures. I thought I would share some of the 'before' photoshop pictures and the 'after.' I still have much to learn. I don't quite have the eye for it yet. I can tell when an original picture is too dark but I still struggle with how much to lighten it, when to soften, when to sharpen, etc.. (Just a note so you don't think I'm a horrible & crazy parent: we usually do not allow them to wear makeup like this but we had a "Rocker Girl" themed party where they got their hair, nails and makeup done)
Birthday Girl
The first picture was ok but seemed a little dull and lifeless.
The hubs & our youngest
In the 'after' I should have tried to sharpen it even more. It's too blurry looking, and too dark but I love the timelessness that a black and white gives.
Our oldest, pretending to be a super model/rock star.
The bright light from below was actually the light streaming in from the kitchen window. My nieces were up on the counter trying to block it but I kind of like it. It's looks fun to me (professional photographers would likely disagree!). The only thing I changed in the 'after' was that I removed the outlet & lightened the overall picture just a little. Did you notice the outlet?
My youngest
I changed it to black and white and lightened it a little.
(Don't mind the horrid upholstery on the seat-it's in line for a change once we decide on fabric)
Finally, the birthday girl again. She was opening presents in this one.
In the second picture I changed the coloring up using free action sets from The Pioneer Woman. She has some wonderful photography lessons on her blog (and recipes, home schooling tips, home & gardening tips..she's basically wonder woman!!)
So those are some of my attempts at Photoshop. I'm looking to purchase a new camera as well but have a lot more research to do before making the move. I want something that I can grow into (so I don't want to buy another one a year from now), but don't want to overbuy. I'll keep you posted on what I decide.
Have a great week, and feel free to share your photography successes, mishaps or any other little tidbits you would like.
Thursday, November 3, 2011
Annie Sloan & Two French Headboards
Hurray...tomorrow is Friday!!!
I find it a bit silly that I still love Friday so much, even though I'm home every day of the week. I think it is because when the weekend comes I have more freedom to do other things since the hubs is usually home.
Whatever reason, I'm glad the weekend is almost here!
You can also find this post, and many more amazing projects, on the French Country Cottage blog.
Today I am posting on two little frenchy headboards that I picked up at the Goodwill. So, I doubt that they are really french but that's what they resemble in my humble mind. They were quite ugly when I picked them up (my mom gave me one of those looks), but in this business you have to be able to see past the current color or style but instead see if the shape and detail are there. I got ahead of myself and started to sand them when I realized I hadn't taken a picture. They were originally all the yellow color. Here they are before.
They sat in the garage like this for a month or so (much to my husband's despair-he just loves projects sitting around) while I decided what to do with them. Well, a few weeks ago I purchased Annie Sloan's book on paint transformations using her chalk paint (not chalkboard paint-completely different). Lucky me, she had done a similar headboard and I loved it! The outside trim is painted in Old White and the center in Duck Egg Blue.
This paint is rather thick and I did use it full strength. In the future I think I will dilute it with water just a bit so it goes on smoother. As a result, this does have the hand painted look. I also distressed the headboards slightly, and covered them with a coat of Fiddes & Sons wax in Light (clear). Overall, I really like them and I wish my two girls would agree to put them in their room, but they just "aren't cool" for them right now. I disagree, but such is life. I can also imagine them in a guest room for when little guests come to visit, maybe over the holidays. With that lovely image of a cozy holiday with a house-full-of-guests in mind...I'm off to sleep.
Until next time,
Brandi
I find it a bit silly that I still love Friday so much, even though I'm home every day of the week. I think it is because when the weekend comes I have more freedom to do other things since the hubs is usually home.
Whatever reason, I'm glad the weekend is almost here!
You can also find this post, and many more amazing projects, on the French Country Cottage blog.
Today I am posting on two little frenchy headboards that I picked up at the Goodwill. So, I doubt that they are really french but that's what they resemble in my humble mind. They were quite ugly when I picked them up (my mom gave me one of those looks), but in this business you have to be able to see past the current color or style but instead see if the shape and detail are there. I got ahead of myself and started to sand them when I realized I hadn't taken a picture. They were originally all the yellow color. Here they are before.
They sat in the garage like this for a month or so (much to my husband's despair-he just loves projects sitting around) while I decided what to do with them. Well, a few weeks ago I purchased Annie Sloan's book on paint transformations using her chalk paint (not chalkboard paint-completely different). Lucky me, she had done a similar headboard and I loved it! The outside trim is painted in Old White and the center in Duck Egg Blue.
This paint is rather thick and I did use it full strength. In the future I think I will dilute it with water just a bit so it goes on smoother. As a result, this does have the hand painted look. I also distressed the headboards slightly, and covered them with a coat of Fiddes & Sons wax in Light (clear). Overall, I really like them and I wish my two girls would agree to put them in their room, but they just "aren't cool" for them right now. I disagree, but such is life. I can also imagine them in a guest room for when little guests come to visit, maybe over the holidays. With that lovely image of a cozy holiday with a house-full-of-guests in mind...I'm off to sleep.
Until next time,
Brandi
Tuesday, October 25, 2011
Painting a House & Other Things I Get Myself Into
Painting and priming and scrapping, oh my.
My, oh my, oh my. Have you ever offered to help (your mom, your friend, your grandpa's dentist..) with a project out of the goodness of your heart and then when you jump in it takes WAAAAY more energy and time than you expected? That's where I'm living <sigh>.
Earlier this spring my mom mentioned that her house needed painted but that it would cost between $2,000-$3,000 (if I recall correctly). Years ago in high school, I painted our small, one-story, ranch house and therefore figured I could save her the $$ and do it myself (Note to self: think it through for a week..or month..before volunteering next time). On the contrary, this is a two-story with a walk out basement (3 story in the back) and steep, downward sloping sides (not so great for stabilizing an extension ladder).
Ok, enough of the whining and complaining and on to the details. I painted the front with a brush and flat sponge combo. That was time intensive! However, it seemed easier considering all of the windows I would have needed to cover if using a sprayer (it may have been that I will still scared of using the sprayer at this point). After that I got smart and used the sprayer as mentioned in this post. My little brother even helped!
Now on to the trim. When they say the devil is in the details, they weren't kidding (who is 'they' by the way?). The windows and trim were in desperate need of attention. When you got up close they looked like this.
Oh yes, and do you see the overspray on the window? That's where I waslazy lax on covering the windows properly when using the sprayer. I have no patience for prep work. It's a terrible habit, but I would rather go back with a razor blade and scrape off the paint than take the time to cover it all perfectly.
Back to the scraping. In order to do it properly (and avoid re-doing it next year) you will need to be thorough and scrape until you remove all loose pieces. In some places it is likely that you will be down to bare wood. Now, and this is important, you will need to prime the areas with bare wood with an oil based, exterior primer. This will keep the moisture from the snow and rain out and protect the window from rotting. Replacing rotting wood is no fun (which we also have to do on some windows)! The scraping alone will take several days, particularly if you have a tall house requiring an extension ladder. You will also need to allow the primer to dry for a day or two prior to applying the top coat.
Can you tell where I have scrapped/painted/primed and where I haven't?
I must have been falling over when taking this one (sorry).
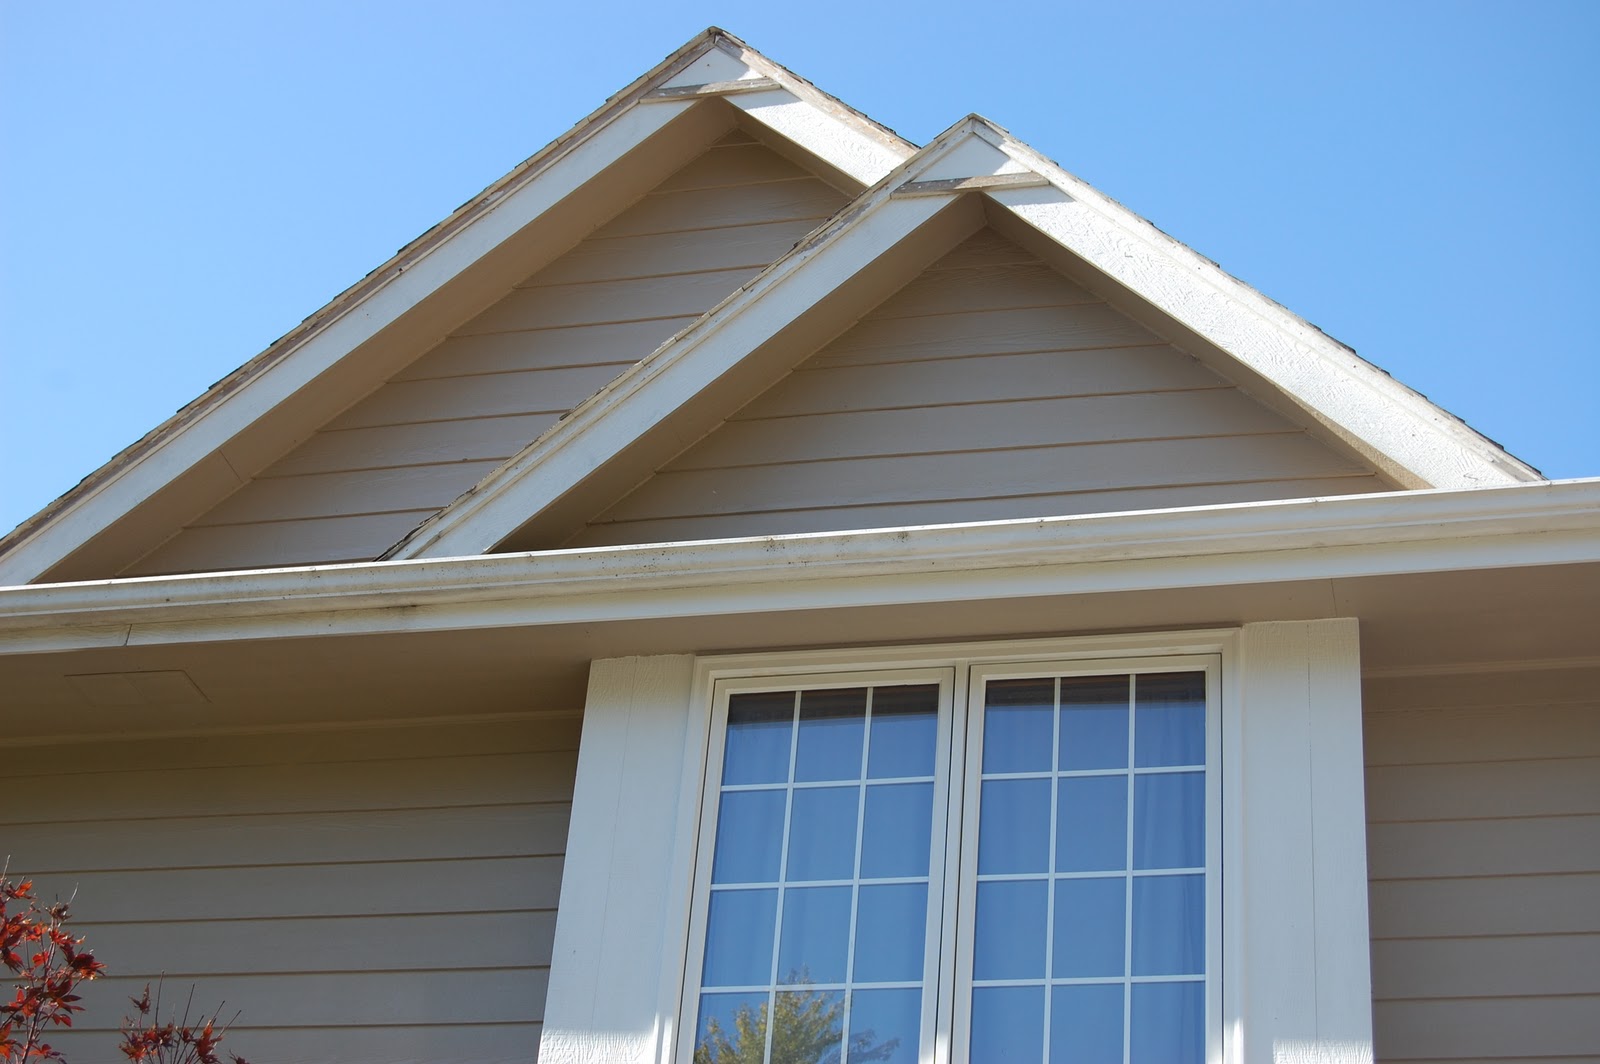
I know it's hard to see if you aren't close, but I have completed everything on the front except the two peaks and the trim under the gutters (which need cleaned first). Getting the ladder up to the peaks has proved challenging, particularly with the little red tree there.
So if I am absent for a few moreweeks days, you know where I am (behind the house, working on the windows you can't see from the street). Don't mind all the 'stuff' laying around, waiting to be put away for the winter (a girl can only do so much), as well as Bill, the dog, sneaking in to the picture. Did you see him in the one above, too?
On the flip side, I am so thankful for the abnormally warm weather! It has been beautiful and has allowed me to work on the windows much longer than would normally be possible in Iowa this time of year.
I would love to know, have you ever volunteered for something that turned into a much bigger job than you expected?
My, oh my, oh my. Have you ever offered to help (your mom, your friend, your grandpa's dentist..) with a project out of the goodness of your heart and then when you jump in it takes WAAAAY more energy and time than you expected? That's where I'm living <sigh>.
Earlier this spring my mom mentioned that her house needed painted but that it would cost between $2,000-$3,000 (if I recall correctly). Years ago in high school, I painted our small, one-story, ranch house and therefore figured I could save her the $$ and do it myself (Note to self: think it through for a week..or month..before volunteering next time). On the contrary, this is a two-story with a walk out basement (3 story in the back) and steep, downward sloping sides (not so great for stabilizing an extension ladder).
Ok, enough of the whining and complaining and on to the details. I painted the front with a brush and flat sponge combo. That was time intensive! However, it seemed easier considering all of the windows I would have needed to cover if using a sprayer (it may have been that I will still scared of using the sprayer at this point). After that I got smart and used the sprayer as mentioned in this post. My little brother even helped!
Now on to the trim. When they say the devil is in the details, they weren't kidding (who is 'they' by the way?). The windows and trim were in desperate need of attention. When you got up close they looked like this.
Oh yes, and do you see the overspray on the window? That's where I was
Back to the scraping. In order to do it properly (and avoid re-doing it next year) you will need to be thorough and scrape until you remove all loose pieces. In some places it is likely that you will be down to bare wood. Now, and this is important, you will need to prime the areas with bare wood with an oil based, exterior primer. This will keep the moisture from the snow and rain out and protect the window from rotting. Replacing rotting wood is no fun (which we also have to do on some windows)! The scraping alone will take several days, particularly if you have a tall house requiring an extension ladder. You will also need to allow the primer to dry for a day or two prior to applying the top coat.
Can you tell where I have scrapped/painted/primed and where I haven't?
I must have been falling over when taking this one (sorry).
I know it's hard to see if you aren't close, but I have completed everything on the front except the two peaks and the trim under the gutters (which need cleaned first). Getting the ladder up to the peaks has proved challenging, particularly with the little red tree there.
So if I am absent for a few more
On the flip side, I am so thankful for the abnormally warm weather! It has been beautiful and has allowed me to work on the windows much longer than would normally be possible in Iowa this time of year.
I would love to know, have you ever volunteered for something that turned into a much bigger job than you expected?
Tuesday, October 18, 2011
Follow Me...
Hi there!
So I thought that some of you that may not be veterans to the blogging world might wonder what the "Follow Me" button entails. Are you signing away your first born? Will you receive text, facebook and email messages three times a day? Oh my gosh, what will happen!?!?! No way am I touching that button!
Take a deep breath. In through the nose, out through the mouth. Ahhhh.... that's better.
Ok now, there are two ways that you can follow a blog, depending on what they are offering. One is "Follow by Email" and the other is to "Follow Me," through Blogger.
Say what? So anyone who has a blog has the option to offer their readers a follow by email option, follow through blogger option or both. AND they have the option of "naming" them something different. For instance, I called my follow button through blogger "Follow Me." Now, what's the difference?
So I hope that you are confident and comfortable to "follow me" in the future. Check out some of the blogs I follow as well (which are listed in the sidebar at the right).
So I thought that some of you that may not be veterans to the blogging world might wonder what the "Follow Me" button entails. Are you signing away your first born? Will you receive text, facebook and email messages three times a day? Oh my gosh, what will happen!?!?! No way am I touching that button!
Take a deep breath. In through the nose, out through the mouth. Ahhhh.... that's better.
Ok now, there are two ways that you can follow a blog, depending on what they are offering. One is "Follow by Email" and the other is to "Follow Me," through Blogger.
Say what? So anyone who has a blog has the option to offer their readers a follow by email option, follow through blogger option or both. AND they have the option of "naming" them something different. For instance, I called my follow button through blogger "Follow Me." Now, what's the difference?
- Blogger "Follow Me" allows you to bookmark my (or other) blogs, if you will. You can use a current twitter or google account to sign in and see the updates as you see fit (1x a year, 1x a day, whatever..)
- "Follow by email" means that you will be sent an email anytime there is a new blog post
So I hope that you are confident and comfortable to "follow me" in the future. Check out some of the blogs I follow as well (which are listed in the sidebar at the right).
Paper Mache Barstools
Yep, you can paper mache just about anything.
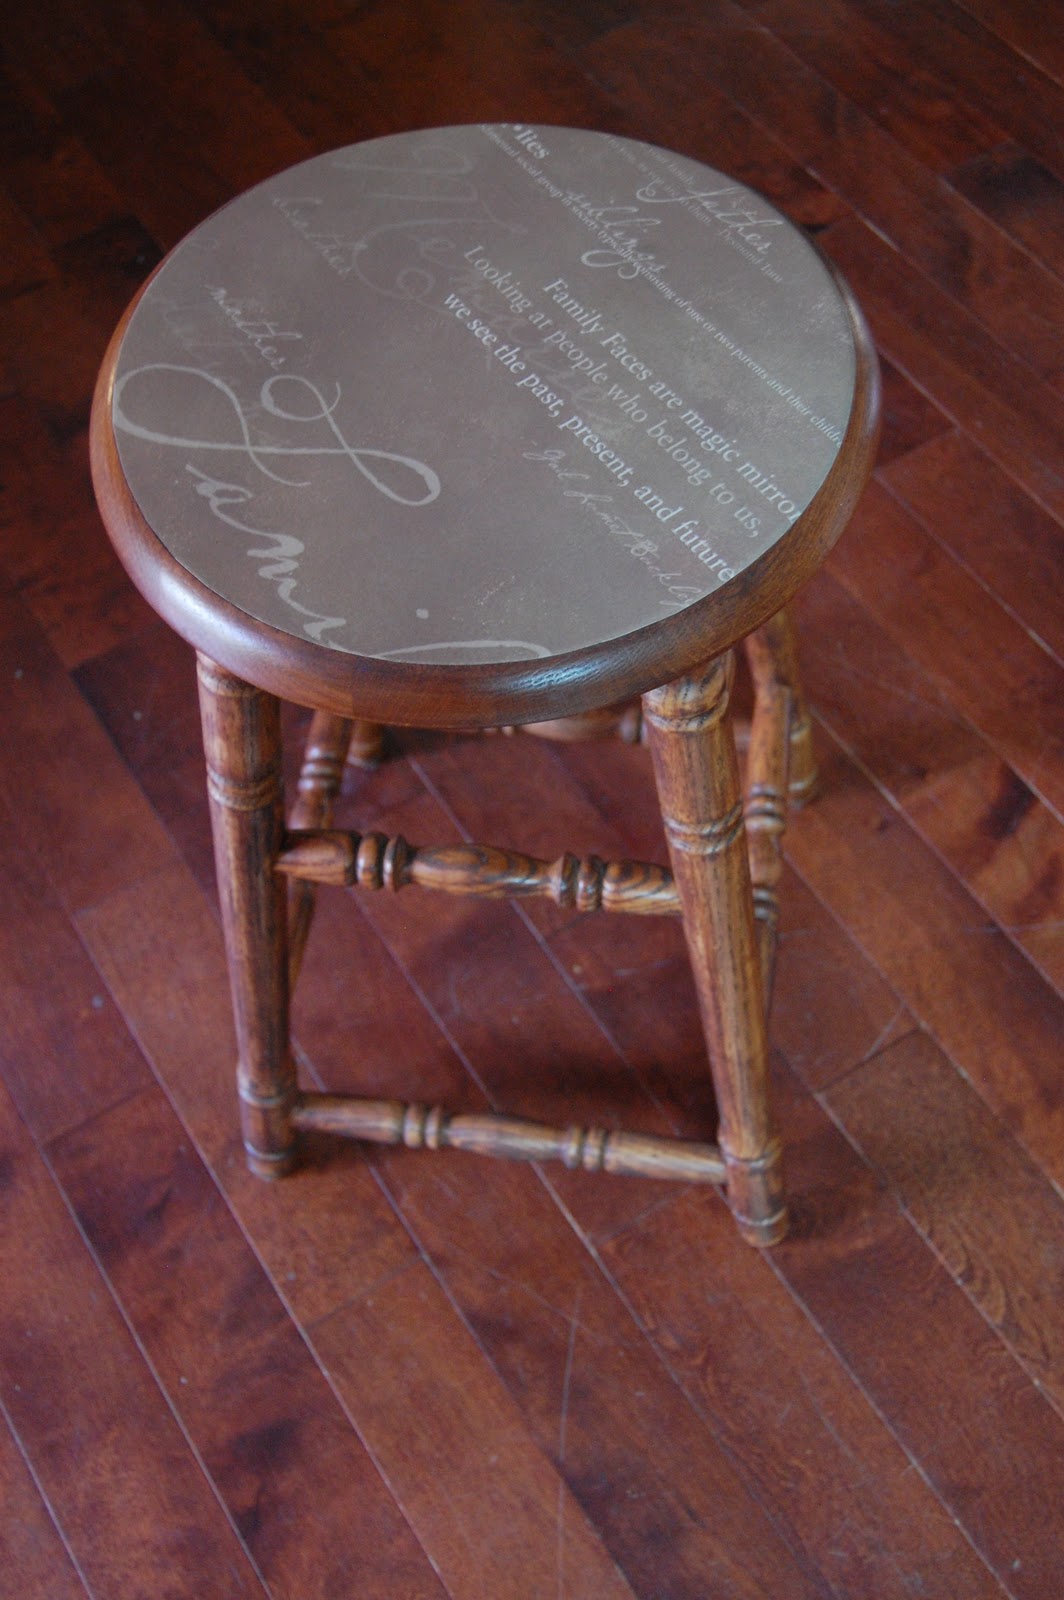
In this case my mom was about to get rid of two barstools that she thought were at the end of their lives. They had a big, heavy back but the grandbabies (yes, my kiddos) would often tip over in them. Not good. So after removing the backs we were left with a simple stool, but with a hole-laden, unfinished top. Not pretty, but I just couldn't see throwing perfectly good, solid wood stools out. I finally found some of the before pictures.
The stools were a golden oak color that matched the kitchen, however, since my parents replaced their flooring with a red mahogany look, I thought the stools should match. I prefer dark woods anyway, so that's what they were getting. Lucky for me, the finish was wearing off, as was the stain. That's a good thing only when it means less work for me! I gave them a light sand to get the remaining stain off, then wiped them down to remove all dust. I stained them with Minwax Red Mahogany stain. Now I was getting somewhere. Except the top was still a mess. Hmm... I had to cover it in some way. I couldn't simply fill the holes with wood putty because it would show up when I stained it. In comes the paper mache!
I found some pretty scrapbook paper at Michael's that had a 'Family' saying on it. Perfect! Still, the holes had to go or my monsters someone would inevitably poke something through the paper eventually. So with the help of my trusty, motherly assistant we cut some small dowel rods down to fit in the holes. Add a little wood glue and problem solved! After allowing it to dry, it was on to the paper mache.
I flipped the stool upside down onto the paper that I had placed on the counter. Draw around the circle top and you have a near perfect cut out. However, if you buy a piece of decorative paper that has words on it make sure to align the stool to the wording so that you can read it when it's finished. I had a bit of a time with this since my paper wasn't big enough to adjust the wording any further. Next, put a layer of Mod Podge on the back of the paper with a foam "brush", flip it upright, and center it on your stool. Smooth out any bubbles very carefully and quickly. I then put another layer of Mod Podge on top. Again, work quickly when smoothing the paper. After it dries do another two to three coats to seal and protect the top.
Tips and warnings: If you mess with the paper too much while it's wet you will tear the top layer of paper off. I tell you this from experience. I ended up tearing a piece off entirely and starting over. Ugh! So, if you see some bubbles while it's drying... leave.them.alone!! It is normal to have some bubbles while still wet. So wait until it's dry and then take a look. If you still have some bubbles I either slit it with a sharp razor blade (not the kind you shave with) or poke it with a small needle and then put a bit of Mod Podge in the hole, then press down.
Friday, October 7, 2011
Photography
Happy Friday!
This week seems to be dominated by photography tutorials in the blogger world,forcing encouraging me to focus on my photography skills (or lack thereof). I don't know about you, but as a point and shoot kinda gal, it has been quite a transition to learn all the in's and out's of a digital camera and I gotta admit (as if it isn't obvious)...I still have a long way to go.
With all that inspiration, I decided to take my digital camera outside and just see what happened on different settings. My pretty little assistant (aka my youngest) agreed to be my subject, as if she had a choice.
This week seems to be dominated by photography tutorials in the blogger world,
With all that inspiration, I decided to take my digital camera outside and just see what happened on different settings. My pretty little assistant (aka my youngest) agreed to be my subject, as if she had a choice.
She is actually standing against the glass, front door and the tree & street are reflecting off of it.
I wish I could say she got those lashes from me!
Oh, the faces..
I don't care for the coloring on this one but I just repainted this chair for a photographer friend and LOVE the bright blue (see the chair 'before' on the picture above)
I used Picnik to play with the effects on these pictures. I'm hoping to purchase Photoshop soon but just haven't gotten there yet, not to mention I will have to give up an arm, and possibly a leg to get it.
It was fun to try different things but I still don't have the different settings down and I really need to get experience working with aperature and shutter speed. I saw a great tutorial series on The Pioneer Woman. Her blog is just all around amazing, and as you will see, she knows how to work a camera!
So what photography successes and challenges have you had?
Sunday, October 2, 2011
Paint Sprayer Goodness
Let me introduce you to my new best friend....
Let me tell you how our story began. Earlier this summer I agreed to paint my mom's house, thinking I could save her the money of hiring a contractor. That being said, the summer was either really hot or really wet, only allowing me to finish the front (and the easiest) part of the house. Silly me- I did this with a brush. Yes, by hand, with a brush. Painful! I just couldn't see painting the sides (which slope downhill in a major way) and the back (a two-story with a walk out basement = 3 stories) on a ladder, with a brush.
So, instead, I decided to try out the sprayer that my mom has had on the top shelf in the garage for the past 2 years. Oh.my.goodness. WHY on earth didn't I do this before!?! Not only that, my little brother has the same one so he agreed to come down and we could both paint at the same time. Woo hoo! It took us two weekends but we got her done. (Well, sort of- I still have to paint the trim)
We used the Wagner Spray Tech 0151500 for painting the house. It made the job so easy and much, much quicker. The only downfalls were that when the paint started getting on the low side (not empty) it would spit and spray in globs until you added more paint and the filter wouldn't allow our paint (quality stuff from Sherwin Williams) to go through the tubing so we had to water it down. The other downfall- cleaning it took awhile. So, I think I may look into some other styles for furniture painting. Ones that are quicker to clean and don't have a huge canister/tub. Overall though, it was great and I'm pretty sure that I will never, ever paint a house 'by hand' again.
Ahhhh....so nice to have that "little" task done, but perhaps even more importantly, I made a new friend and I think (s)he is going to make my life MUCH easier.
Let me tell you how our story began. Earlier this summer I agreed to paint my mom's house, thinking I could save her the money of hiring a contractor. That being said, the summer was either really hot or really wet, only allowing me to finish the front (and the easiest) part of the house. Silly me- I did this with a brush. Yes, by hand, with a brush. Painful! I just couldn't see painting the sides (which slope downhill in a major way) and the back (a two-story with a walk out basement = 3 stories) on a ladder, with a brush.
So, instead, I decided to try out the sprayer that my mom has had on the top shelf in the garage for the past 2 years. Oh.my.goodness. WHY on earth didn't I do this before!?! Not only that, my little brother has the same one so he agreed to come down and we could both paint at the same time. Woo hoo! It took us two weekends but we got her done. (Well, sort of- I still have to paint the trim)
We used the Wagner Spray Tech 0151500 for painting the house. It made the job so easy and much, much quicker. The only downfalls were that when the paint started getting on the low side (not empty) it would spit and spray in globs until you added more paint and the filter wouldn't allow our paint (quality stuff from Sherwin Williams) to go through the tubing so we had to water it down. The other downfall- cleaning it took awhile. So, I think I may look into some other styles for furniture painting. Ones that are quicker to clean and don't have a huge canister/tub. Overall though, it was great and I'm pretty sure that I will never, ever paint a house 'by hand' again.
Ahhhh....so nice to have that "little" task done, but perhaps even more importantly, I made a new friend and I think (s)he is going to make my life MUCH easier.
Subscribe to:
Posts (Atom)