Thursday, October 27, 2011

Festive Fall Acorn Cookies

Hello my lovelies. This fall weather has me in the mood for Christmas shopping (half way done!) and baking. A little fact about me, I LOVE to bake. Probably relates to my wicked sweet tooth, regardless, I used to bake every week in high school and take the treats to the bank I worked at.

Anywho... my obsession with Pinterest led me to these adorable little acorn cookies.
So cute, right? And they are delicious! I'm not a huge peanut butter & chocolate fan but I really enjoyed these.

Now, I really, really hate when the original source is not listed on Pinterest, such was the case here. I even tried to search elsewhere, to no avail. So my apologies to the creator of these little cuties for not linking back.
So how do you make them? Easy peasy...
You need:
   -Snack size Nutter Butter
   -Mini, semi-sweet chocolate chips
   -Hershey's Kisses

Melt a 1/2 cup or so (I winged it) of the mini chocolate chips in the microwave, stopping to stir every 30 seconds. These melt quickly (and burn quickly) so don't skimp on this. Then you take some of the extra (whole) mini-chips, dip them in the chocolate and place them in the center of the Nutter Butter cookie.
 Just a tip: dipping them didn't work well for me because I couldn't grip them well. So instead, I used a toothpick, dipped it in the melted chocolate, spread it on the bottom of the mini-chip and then put it on the cookie.
I then refrigerated them to harden the chocolate. Next, unwrap the number of kisses you need and set aside. Reheat the chocolate to melt it again. It shouldn't take long. Finally, dip the kiss in the melted chocolate and stick it to the other side of the Nutter Butter (make sure the mini chip has hardened & is firmly stuck first, otherwise they will slide off). I placed them on a cookie sheet covered with wax paper to dry. Put them back in the frig for 10 minutes to speed up the drying process if you wish.

Voila! Cute little snack with very little difficulty!

Tuesday, October 25, 2011

Painting a House & Other Things I Get Myself Into

Painting and priming and scrapping, oh my.
My, oh my, oh my. Have you ever offered to help (your mom, your friend, your grandpa's dentist..) with a project out of the goodness of your heart and then when you jump in it takes WAAAAY more energy and time than you expected? That's where I'm living <sigh>.
 Earlier this spring my mom mentioned that her house needed painted but that it would cost between $2,000-$3,000 (if I recall correctly). Years ago in high school, I painted our small, one-story, ranch house and therefore figured I could save her the $$ and do it myself (Note to self: think it through for a week..or month..before volunteering next time). On the contrary, this is a two-story with a walk out basement (3 story in the back) and steep, downward sloping sides (not so great for stabilizing an extension ladder).

Ok, enough of the whining and complaining and on to the details. I painted the front with a brush and flat sponge combo. That was time intensive! However, it seemed easier considering all of the windows I would have needed to cover if using a sprayer (it may have been that I will still scared of using the sprayer at this point). After that I got smart and used the sprayer as mentioned in this post. My little brother even helped!

Now on to the trim. When they say the devil is in the details, they weren't kidding (who is 'they' by the way?). The windows and trim were in desperate need of attention. When you got up close they looked like this.
Oh yes, and do you see the overspray on the window? That's where I was lazy lax on covering the windows properly when using the sprayer. I have no patience for prep work. It's a terrible habit, but I would rather go back with a razor blade and scrape off the paint than take the time to cover it all perfectly.

Back to the scraping. In order to do it properly (and avoid re-doing it next year) you will need to be thorough and scrape until you remove all loose pieces. In some places it is likely that you will be down to bare wood. Now, and this is important, you will need to prime the areas with bare wood with an oil based, exterior primer. This will keep the moisture from the snow and rain out and protect the window from rotting. Replacing rotting wood is no fun (which we also have to do on some windows)!  The scraping alone will take several days, particularly if you have a tall house requiring an extension ladder. You will also need to allow the primer to dry for a day or two prior to applying the top coat.

Can you tell where I have scrapped/painted/primed and where I haven't?
 I must have been falling over when taking this one (sorry).
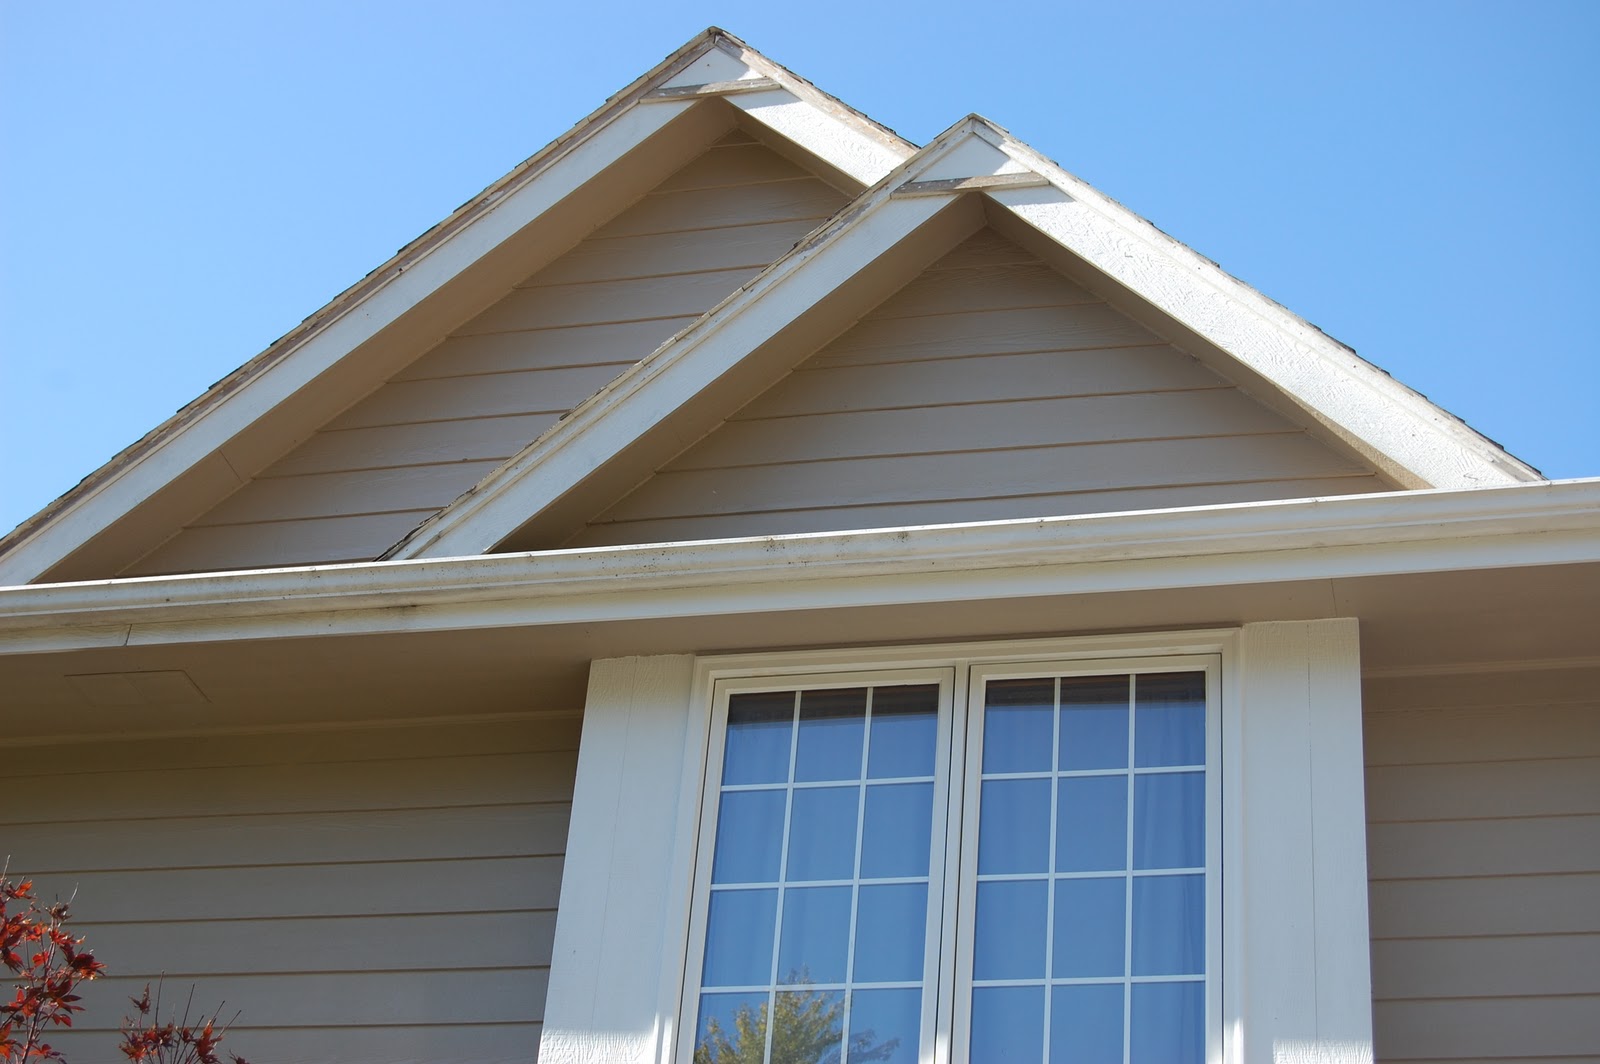
I know it's hard to see if you aren't close, but I have completed everything on the front except the two peaks and the trim under the gutters (which need cleaned first). Getting the ladder up to the peaks has proved challenging, particularly with the little red tree there.

So if I am absent for a few more weeks days, you know where I am (behind the house, working on the windows you can't see from the street). Don't mind all the 'stuff' laying around, waiting to be put away for the winter (a girl can only do so much), as well as Bill, the dog, sneaking in to the picture. Did you see him in the one above, too?
On the flip side, I am so thankful for the abnormally warm weather! It has been beautiful and has allowed me to work on the windows much longer than would normally be possible in Iowa this time of year.

I would love to know, have you ever volunteered for something that turned into a much bigger job than you expected?

Tuesday, October 18, 2011

Follow Me...

Hi there!
So I thought that some of you that may not be veterans to the blogging world might wonder what the "Follow Me" button entails. Are you signing away your first born? Will you receive text, facebook and email messages three times a day? Oh my gosh, what will happen!?!?! No way am I touching that button!

Take a deep breath. In through the nose, out through the mouth. Ahhhh.... that's better.
Ok now, there are two ways that you can follow a blog, depending on what they are offering. One is "Follow by Email" and the other is to "Follow Me," through Blogger.

Say what? So anyone who has a blog has the option to offer their readers a follow by email option, follow through blogger option or both. AND they have the option of "naming" them something different. For instance, I called my follow button through blogger "Follow Me." Now, what's the difference?
  • Blogger "Follow Me" allows you to bookmark my (or other) blogs, if you will. You can use a current twitter or google account to sign in and see the updates as you see fit (1x a year, 1x a day, whatever..)
  • "Follow by email" means that you will be sent an email anytime there is a new blog post
I personally like the "follow me" (Blogger) version because then I can control if and when I look at the blogs I like. But by all means, if you prefer email then follow a blog via email (too). However, keep in mind that you can always remove yourself from either at any time. Oh, thank goodness... (I know you are thinking it!)

So I hope that you are confident and comfortable to "follow me" in the future. Check out some of the blogs I follow as well (which are listed in the sidebar at the right).

Paper Mache Barstools

Yep, you can paper mache just about anything.
In this case my mom was about to get rid of two barstools that she thought were at the end of their lives. They had a big, heavy back but the grandbabies (yes, my kiddos) would often tip over in them. Not good. So after removing the backs we were left with a simple stool, but with a hole-laden, unfinished top. Not pretty, but I just couldn't see throwing perfectly good, solid wood stools out. I finally found some of the before pictures.

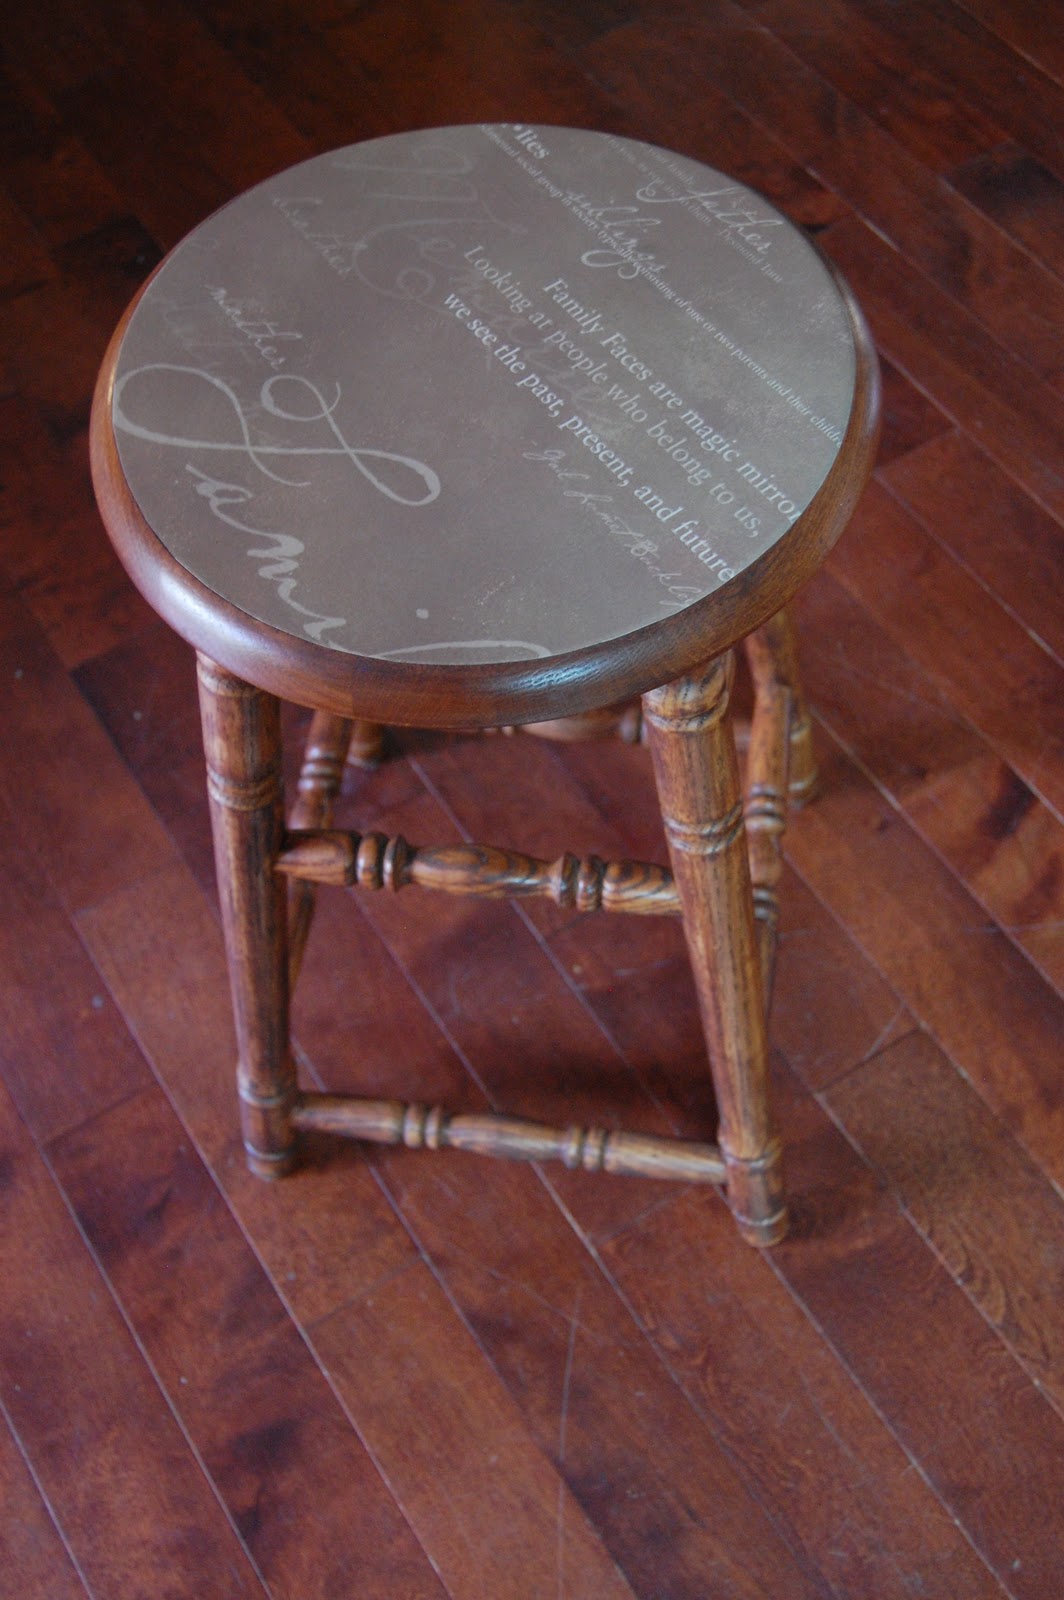
The stools were a golden oak color that matched the kitchen, however, since my parents replaced their flooring with a red mahogany look, I thought the stools should match. I prefer dark woods anyway, so that's what they were getting. Lucky for me, the finish was wearing off, as was the stain. That's a good thing only when it means less work for me! I gave them a light sand to get the remaining stain off, then wiped them down to remove all dust. I stained them with Minwax Red Mahogany stain. Now I was getting somewhere. Except the top was still a mess. Hmm... I had to cover it in some way. I couldn't simply fill the holes with wood putty because it would show up when I stained it. In comes the paper mache! 

I found some pretty scrapbook paper at Michael's that had a 'Family' saying on it. Perfect! Still, the holes had to go or my monsters someone would inevitably poke something through the paper eventually. So with the help of my trusty, motherly assistant we cut some small dowel rods down to fit in the holes. Add a little wood glue and problem solved! After allowing it to dry, it was on to the paper mache.

 
I flipped the stool upside down onto the paper that I had placed on the counter. Draw around the circle top and you have a near perfect cut out. However, if you buy a piece of decorative paper that has words on it make sure to align the stool to the wording so that you can read it when it's finished. I had a bit of a time with this since my paper wasn't big enough to adjust the wording any further. Next, put a layer of Mod Podge on the back of the paper with a foam "brush", flip it upright, and center it on your stool. Smooth out any bubbles very carefully and quickly. I then put another layer of Mod Podge on top. Again, work quickly when smoothing the paper. After it dries do another two to three coats to seal and protect the top.


Tips and warnings: If you mess with the paper too much while it's wet you will tear the top layer of paper off. I tell you this from experience. I ended up tearing a piece off entirely and starting over. Ugh! So, if you see some bubbles while it's drying... leave.them.alone!! It is normal to have some bubbles while still wet. So wait until it's dry and then take a look. If you still have some bubbles I either slit it with a sharp razor blade (not the kind you shave with) or poke it with a small needle and then put a bit of Mod Podge in the hole, then press down.

Friday, October 14, 2011

To Keep or Not to Keep

This is often the question.
When I purchase pieces to refinish of course I choose things I like, some more than others, but 
when they are finished there is often the question as to whether I should keep it or send it to a new home.
Such was (ok-still is) the case with this bedroom set.
Bare with me- I'm not sure who took these before pictures. Obviously someone 
with serious sleep deprivation.


Yuk-I don't know if the pictures or the original finish are worse.
I couldn't resist the familiar pull of Heirloom White spray paint on these, but also decided on some distressing and antiquing with Ralph Lauren's Tea Stain glaze. I wanted the handles to pop a bit more than what they were in the present state so I sprayed them with my other go-to, Oil Rubbed Bronze (or ORB as known in the blogger world).


 I don't love the mirror on it, as is, but I think it would be cute hanging on the wall above the dresser- and perhaps the other direction.


So now, do I put these in my youngest daughter's room, which I am currently making over? Grandma says 'Yes!' but then again, my lovely mother thinks I should keep everything I finish. Oh mom, thanks for your support. I may need it when I'm on an episode of hoarding...