Thursday, December 22, 2011

Crayon Monogram Tutorial


Hi! Happy Holidays!
Today I thought I would share a tutorial on the cute monogram crayola letter I did for my daughters' teachers. I first saw a picture of it on Pinterest and I'm proud to say that I actually DID one of the things I pinned. Now typically I just pin and admire, but this time I completed one of the cute little projects. The original Crayola monogram came from here. Great idea, but not a lot of instruction.

The pictures are not the greatest...it was dark..and late...the night before Christmas break (ie. they had to take them to school the next morning).

Supplies Needed (for 1 monogram):
 - 2 packs of crayons (24 ct so you can get several reds, oranges, etc..)
 - 8 x 10 or 8 1/2 x 11 frame (with stand, if you choose)
 - Scrapbook paper
 - Small letter stamps & ink pad
 - Hot glue gun & knife or boxcutter

On to the tutorial...
I bought two frames (on sale, of course) from Michael's, as well as some creamy white scrapbook paper. I removed the glass and picture that came in the frame. Since the crayons are rather heavy I needed the paper to be heavy as well. So when looking at the frame, I decided to mod podge the scrapbook paper to the cardboard back (the piece that has the stand). It wasn't intentional at the time but it was nice to get a frame with a stand. That way they can choose to hang it or set it on a desk or table using the stand.
I attempted to print out the initial that I needed on a piece of paper but I couldn't get the font wide enough to look right so I got frustrated and gave up on that. Instead I laid out a row of crayons using the rainbow order (ROYGBV)..you know, 'roy-g-biv' like we learned in school, the length I thought looked appropriate. You can see the 'R' I printed out on the paper underneath but I didn't follow that because it was too narrow as I mentioned.
As you can see in the picture, I made the first two and last two crayons go out to the left a bit more. Now, how to cut the crayons. Put your patience hat on for this one. I used the picture that I had from pinterest as a guide when I decided where to cut. The 1st and 13th (in my case) crayon are full length, the 2nd and 3rd from the top and bottom taper in, and the rest are all the same length (they were cut right after the 'O' in Crayola). This side of the letter is rather easy to cut because you cut straight lines. Just score around the whole crayon and then snap off. Easy peasy. Make sure to keep the broken off ends near by. I found it easiest to keep them lined up off to the right so the order remained the same.

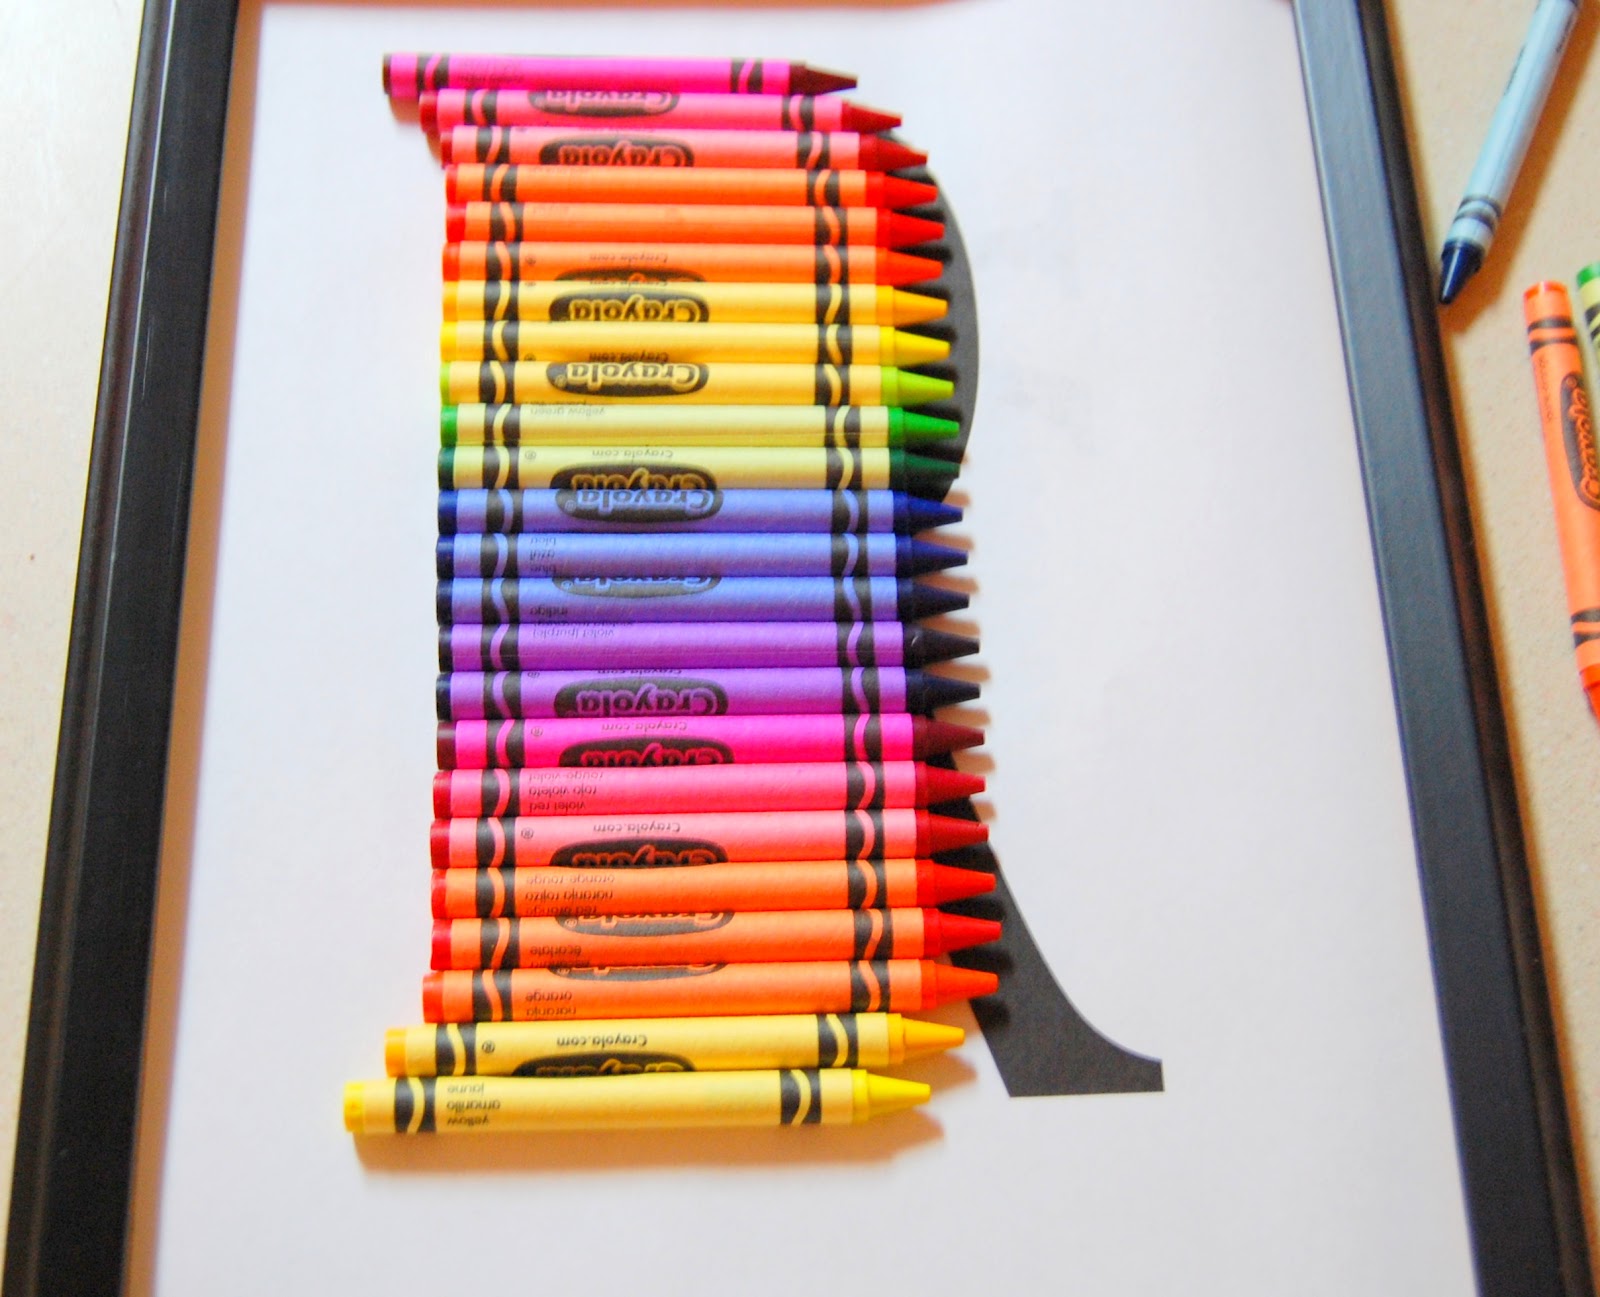
Now for the right, rounded side of the letter (depending on the letter you are doing). This was a bit of an experiment for me. First you will want to align the points of the crayons how you want them (remember, the extra length will be cut off of the left side of the crayon-you keep the tips for this part of the letter). The rounded part of the letter starts at the top and tapers outwards until you reach the middle of the rounded 'R' section, then tapers back in. I hope that makes sense. I then held them in place the drew the "inside" of the rounded 'R' where I wanted to cut them. Note: you will cut them at an angle; angled up and to the left on the top section and down and to the left on the bottom section (see first picture). Do the same with the lower, right section of the 'R'.
Now for the gluing. Ugh, the gluing. I started by putting a little hot glue on the side of the 2nd crayon and gluing to the first. Yep, one by one, I glued them together. You can always "eye ball it" or lightly mark where you want the first crayon on your scrapbook paper but I'm too anal to do that. So I glued all of the crayons together (on one side) and then carefully glued the whole thing on the paper. The first time (first teacher's) I gently flipped it over, applied hot glue to the back of the monogram, then flipped it onto the paper. Well that was frustrating. Hot glue is unforgiving unless you want to rip it off the paper and readjust (ripping the paper too). So you had better get it right the first time. I did ok-not great, but ok. The 2nd time, in my semi-delirious state at this point, I placed the monogram (before applying glue) where I wanted it and then "outlined" it in sticky notes.
I then removed the monogram, hot glued between the sticky notes right onto the paper and then placed the monogram on it. That worked better but still not great. You needn't ask..I was definitely thinking "there must be a better way (but I'm too tired to think of it)."

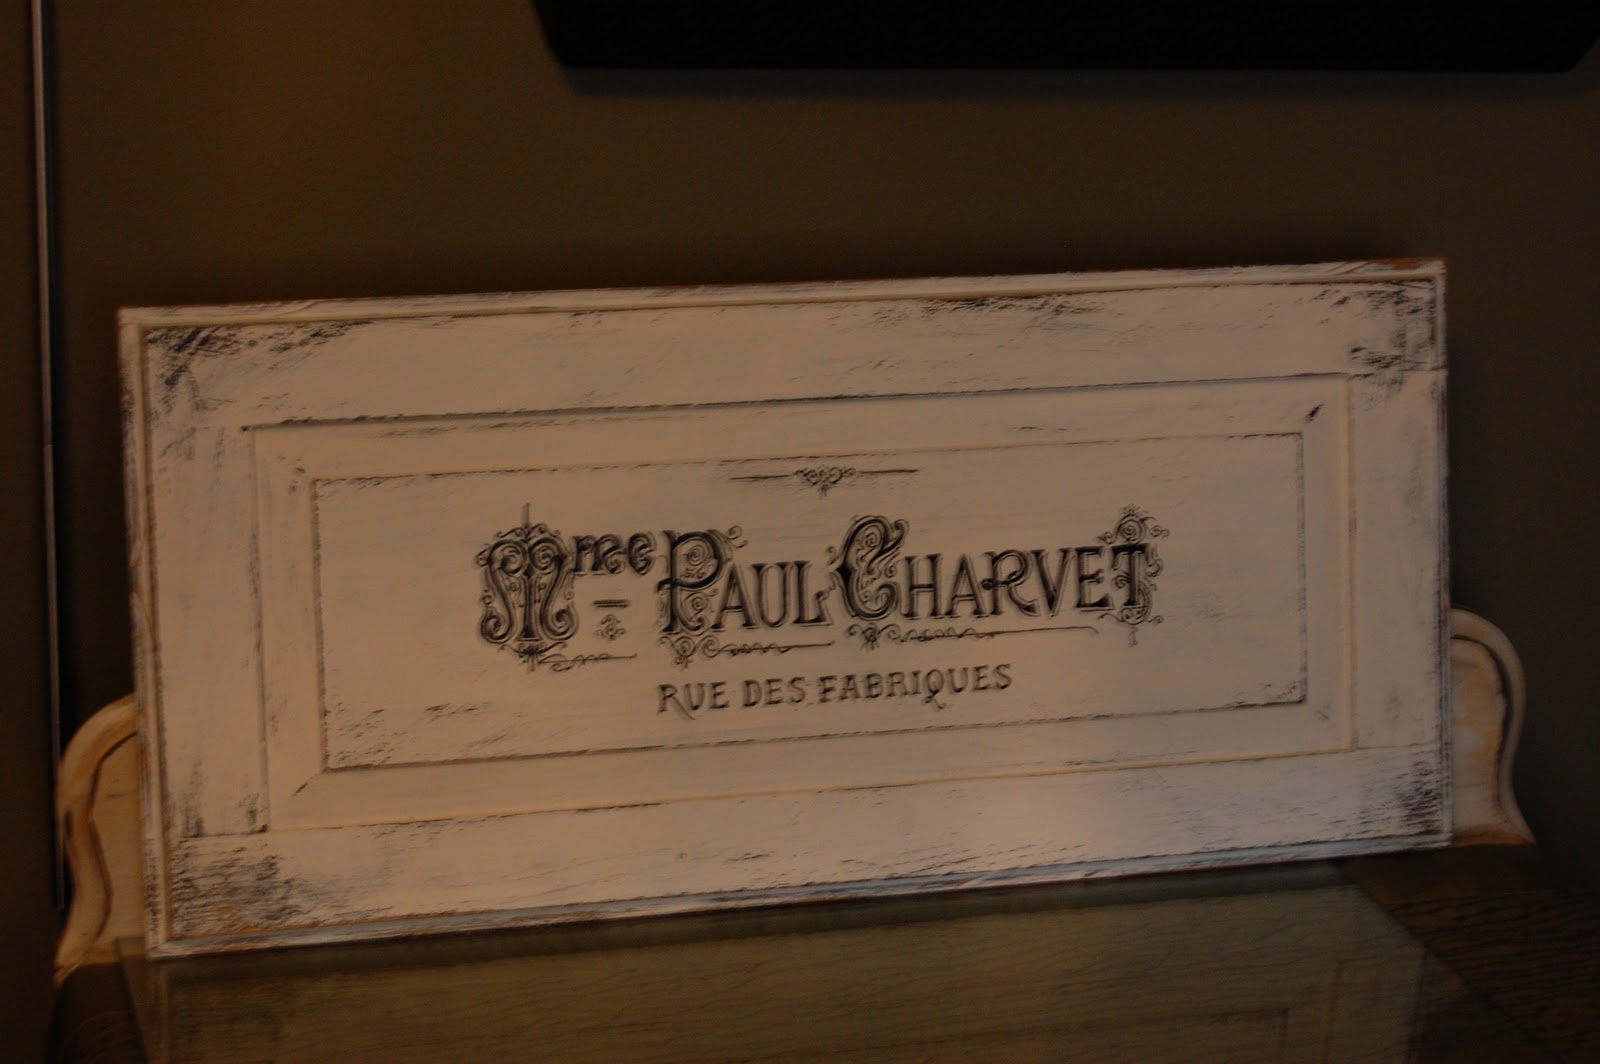
Ok, hard parts over. Now just stamp, write, paint,... a nice little saying on it. Personally, I picked up these tiny alphabet stamps (at an earlier date) in the craft aisle at Wal-mart for a $1 per set. I just knew they would come in handy!

Use whatever message you like, put it in frame and voila, finished!
I'm fairly happy with the end product. I'm a little obsessive compulsive (read: anal) so I was a little disappointed with the round parts of my letters, however, the second time I did it (the "P") went a little better than the first. Live and learn I suppose.


Well, I hope their teachers like them and that you enjoy them too.
Until next time,
Brandi

Tuesday, December 13, 2011

Last Minute DIY Christmas Gifts

I don't know about you but I'm over fighting crowds at the store, looking for the elusive, perfect gift for those left on my list. Or maybe your pocket book is screaming at you and you need to find another way to finish your shopping. While perusing the web I have come across many cute do-it-yourself gift ideas. Here are some of the ideas I've found...

1. Earring Organizer for the young, or older, lady on your list
2. Homemade Food Gift Ideas
3. Resin Window  that you can personalize or change to fit your recipient
4. Handpainted Christmas Stockings or Ornaments
5. Make a gift out of your old Mason Jars
6. Cute little Magnet Board
7. Several age-specific gift ideas
8. Super cute 'I Spy' book, using your kids toys! 

So there you are. Several options to finish up your Christmas list. Not only will it save you some cash, but those on your list will love the fact that you took the time to make their gift yourself! So go turn on some Christmas music and get crafty!
Brandi

Tuesday, December 6, 2011

Sheet Music Dresser & Veneer Repair

Today's post will be about the sheet music dresser I finished recently.


I have to credit the original source, Miss Mustard Seed, with the idea for the sheet music dresser. Love her stuff. The concept is really quite simple, however, in this case I was working with a veneer dresser that was in pretty bad shape. So first I had to deal with the veneer, which could be a post in itself! The veneer on the top of the dresser was partially torn off already but the remaining veneer wasn't budging. So I tried out a trick I heard about recently, using an iron. I simply put an old cloth over a small area and held the iron on there for 20-30 seconds. Then use a small chisel to pry it up. It took a little while but it worked wonderfully (and I actually taught my mom something for once, instead of vice versa!). Now, the top still wasn't in what I would call "paintable" condition, so mod podge it is!

First though, I needed to address the sides.The veneer was coming up on the bottom edges but it wasn't gone completely. I glued it (with wood glue) and clamped it down overnight. I then used wood putty to fill in any small areas that were missing. The putty also helps to glue it down even more. Let it all dry (thicker areas require longer drying time) and then sand. After that's complete, wipe it down well, and on to the painting. I used my go to paint color - Heirloom White - on this dresser. Again, let it dry. I chose to distress the paint on the edges and corners using a medium grit sandpaper, followed by sanding the whole piece with a low grit paper (Note: low grit is a high number paper and vice versa) just to smooth any small bumps or roughness.


Finally, the sheet music application. While I wish that I could just jump right to this part (ie. results!), all the prep work is absolutely necessary to end up with a quality piece. Go through your sheet music and pick out the pieces that you want. I really wanted to mix up the colors a little bit, using light and dark yellowing next to each other. Once you have laid it out and determined a plan, start mod podging! Cover the back of a piece with mod podge and place on your surface. You can cut the edges to fit perfectly before you start or leave a little overhang and cut it off once all your pieces are on. Make sure to use a sharp razor blade if you do it this way, otherwise you may rip your paper. Cover and cut all areas that you want sheet music on, and then go back and cover the tops of the sheet music with mod podge, making sure to get the edges well so that they do not come up. Allow to dry several hours or overnight. Note: when the mod podge is wet the surface will have some bubbles. Don't fret, they will go away once it dries.

Next, add some age. After the first layer of mod podge I used a light brown glaze (Ralph Lauren Tea Stained) to antique it a little more. While I typically use a dry brush, in this case I used a cloth and just wiped a small amount over the entire dresser. Allow to dry. The next day add another layer of mod podge over the sheet music and let dry. Finally, cover the entire dresser with a protective coat of polyurethane (or 3).


That's it folks! It take a little patience but the end result is beautiful, at least I think so!
I hope that it inspires you to do a mod podge project of your own.
Brandi

Saturday, December 3, 2011

Hand Painted Detail

So I must say, I'm having a fabulous time at my first show. It's so gratifying when others like your stuff. It would be even more fabulous if I could sell some of the large furniture but I think it will come with time. As of now, I'm just happy to get my name out there and to meet so many fabulous people.
Chair Seat

I have several signs and painted furniture pieces at the show and it has been interesting to hear the surprise when people learn that they are hand painted. First, I need to clear up that I typically get the graphic from somewhere in blogland (mostly The Graphics Fairy because she is amazing and it's free). I then use my overhead projector (old school, I know) to project the image on my surface of choice. From there it is all hand done. Tedious? Yes. But I love it and I just get so much more satisfaction out of it than a stick on image (although I've seen many nice ones).


So, if you were wondering.... it is hand painted... and I probably cursed and mumbled while painting it, but when it's through I (nearly) always think it was worth it. I hope that others appreciate it too.
I hope that you enjoy the rest of your weekend,
Brandi

Friday, December 2, 2011

A farm house table, sheet music dresser & my first show

If this is your first time here... welcome!

It's been a whirlwind week and it isn't over yet. Not that I'm complaining!
I'm SO excited for my first show this weekend at the Urban Finds Christmas Extravaganza! First a bit on that...

Location    Urban Finds (Lotus Event Center)
                 2134 East Grand Ave
                 Des Moines, Iowa

Date/Time: This evening is invited guests only (that's YOU!)- Friday, December 2nd  6-8pm
                 Friday night is not open to the general public so you can get the best finds before everyone else!

                 Public Hours: Saturday 12/3 & Sunday 12/4  9am-4pm

Admission: Free. However, we are accepting cleaning supplies or cash donations for the Hawthorne House
                  (a local women/children's shelter).

Here's a sneak peek of my booth:


 I hope you can join us! I've been scoping out the goods of the other vendors and there are definitely some good finds!

So if you notice in the above pictures, I have a sheet music dresser (inspired by  Miss Mustard Seed), a striped Duncan Phyfe table, as well as a farm house table. I'm so proud to say that my mom and I built the farm house table ourselves! My very first build project...using real tools.... I've always been a bit scared intimidated by the big saws/power tools so this one was a big deal to me. Plus, it was fun building it with my mom. The original building plan came from Ana White Homemaker. She has some fantastic things over there. Definitely check her blog out!

Back to the point, sorry. While I don't have time to post tutorials on those things today (still scrambling with the last minute projects for the show!) I promise to post more specific details on those soon!

I promise to be more consistent with my posts after this show so stay tuned...
Brandi

Tuesday, November 22, 2011

Grain Sack Pillow

Hello and Happy Thanksgiving!

I AM still alive, believe it or not. So, in my previous post I talked about doing my first show and mentioned that I wasn't very stressed or worried about getting things done. Well, that changed in a hurry! About the middle of last week I went into panic mode, other wise known as "don't go near mom/wife" mode. Ha! In all seriousness, I'm feeling pretty good now but still have a ways to go. Along the way I have also realized that what I intended to be a once a day, or every few days blog, hasn't really worked out that way. I'm still trying to decide what is appropriate and fitting for my life versus what will keep people interested and coming back. It's all such a balancing act and I certainly don't have it mastered yet.

On to the good stuff. I have been working on several of the key pieces for my booth which include a farm house table (built from scratch), a sheet music dresser and a hutch. I will definitely be posting those soon! In between the large projects I have been attempting to get all the "chum" together. (Chum=all the accessories to "pretty up" the booth. My husband and I were watching a reality show on flea markets once and that's what they called it. I had never heard it called that before but I thought it was funny.) Today's post is part of my chum.


Last year I bought a few grain sacks at a sale but wasn't sure what to do with them. Last week while digging through all of my crap valuable finds, I caught them out of the corner of my eye and decided they would be cute pillows! This one is from a place in Independence, Iowa ~ pretty cool. The letters are really faded so I apologize, the pictures stink. In person it is more legible.

On to the how to...
*Choose a pillow form. I bought a 14 x 14 pillow form at Joann's Fabric.

*Then cut the grain sack (it was pillow case shaped) to remove the back half. Laying the sack with letters up, measure the middle (side to side & up and down) and centered it on the pillow form (put the sack on top of the pillow). From there, leave an extra 1 inch on each side so you have room to sew. You can always trim excess later.

*Cut the sack to the size you need (allowing the 1 extra inch). You will also want to cut the same size piece for the backside of the pillow (we used the plain, backside of the grain sack).
*Important: flip the two grain sack pieces over to their backside (upside down, facing each other) and make sure the edges (of the 2 pieces) are evenly lined up. The picture/words should be on the inside  (inside out) when you sew it. You only want to sew around three sides. Otherwise you will have sewn it shut and can no longer stuff your pillow in..swear words will follow...yada, yada, yada.

*Sew around the three sides (my wonderful seamstress mother did it, although this is a really easy sew job), leaving the bottom or top open. Turn the grain sack "shell" right side up-now it should look like the pillow you want (before the pillow is in it). Stuff your pillow in, and then hand sew the remaining edge shut. Hand sewing it will give the cleanest final look.

In the case of this pillow, we thought it would be cute to have the four corners look a little different. So we cut the corners wider initially so that a long tail was left, and then when we (by 'we,' I mean my mom) sewed it we didn't sew the corners shut. After putting the pillow form in we tied the four corners in a knot. My mom did the planning on that piece of it, so I can't take credit. As I may have mentioned before, I was in panic mode and not interested in such details, but thank goodness she was.


That's it! Cute little pillow with minimal work.
Looking back, this was rather long winded. I apologize for that but what did you expect when I haven't blogged for a week?
Have a great turkey day with your family!
Until next time....

Monday, November 14, 2011

My first show!

I apologize for being absent the past few weeks. Wow, were we busy with birthday parties, errands, a hurt hand (or two), more parties, ...you mommas know what I'm talking about, but I have survived it (I may not be sane, but I survived none the less).

During my absence I signed up for my first show! A local business called Urban Finds hosts bi-monthly shows for vendors to display their antiques/funky junk/art, etc... I will be joining them for their December Christmas Extravaganza on December 3rd and 4th. I'm so excited to be doing my first show but it's a bit nerve racking as well. Still trying to decide on all the items I will be bringing. I'm currently working on a narrow farm house table and will certainly post that when it's finished. In the meantime I will be working feverishly to complete everything in time. But who am I kidding, I love to be over-busy (much to my hubby's disdain, ha!).

If you are local I would love for you to come and check it out. More details to come!

Tuesday, November 8, 2011

Photography & Photoshop Learning Curve

When I first started painting furniture I had no idea that it would lead to a blog, and then that the blog would necessitate learning about photography, cameras, picture editing,.... the list goes on. Now, don't get me wrong, I LOVE to learn new things but a little tidbit about me - I have this need to know everything right now. For some reason my mind does not accept that there is a learning curve. Nope- just the requirement to be an expert. At everything. Not so much that I know more than others, just that I have to be perfect at it before I think it's good enough. So how's that workin' out? Well... not so good, but I'm working on it.

We celebrated my middle daughter's 8th birthday last weekend and of course I took some pictures. I thought I would share some of the 'before' photoshop pictures and the 'after.' I still have much to learn. I don't quite have the eye for it yet. I can tell when an original picture is too dark but I still struggle with how much to lighten it, when to soften, when to sharpen, etc.. (Just a note so you don't think I'm a horrible & crazy parent: we usually do not allow them to wear makeup like this but we had a "Rocker Girl" themed party where they got their hair, nails and makeup done)

Birthday Girl
The first picture was ok but seemed a little dull and lifeless.


The hubs & our youngest
In the 'after' I should have tried to sharpen it even more. It's too blurry looking, and too dark but I love the timelessness that a black and white gives.

Our oldest, pretending to be a super model/rock star.
The bright light from below was actually the light streaming in from the kitchen window. My nieces were up on the counter trying to block it but I kind of like it. It's looks fun to me (professional photographers would likely disagree!). The only thing I changed in the 'after' was that I removed the outlet & lightened the overall picture just a little. Did you notice the outlet?


My youngest insisting on trying to do her own makeup.
I changed it to black and white and lightened it a little.
(Don't mind the horrid upholstery on the seat-it's in line for a change once we decide on fabric)


Finally, the birthday girl again. She was opening presents in this one.
In the second picture I changed the coloring up using free action sets from The Pioneer Woman. She has some wonderful photography lessons on her blog (and recipes, home schooling tips, home & gardening tips..she's basically wonder woman!!)


So those are some of my attempts at Photoshop. I'm looking to purchase a new camera as well but have a lot more research to do before making the move. I want something that I can grow into (so I don't want to buy another one a year from now), but don't want to overbuy. I'll keep you posted on what I decide.

Have a great week, and feel free to share your photography successes, mishaps or any other little tidbits you would like.


Thursday, November 3, 2011

Annie Sloan & Two French Headboards

Hurray...tomorrow is Friday!!!
I find it a bit silly that I still love Friday so much, even though I'm home every day of the week. I think it is because when the weekend comes I have more freedom to do other things since the hubs is usually home.
Whatever reason, I'm glad the weekend is almost here!

You can also find this post, and many more amazing projects, on the French Country Cottage blog.


Today I am posting on two little frenchy headboards that I picked up at the Goodwill. So, I doubt that they are really french but that's what they resemble in my humble mind. They were quite ugly when I picked them up (my mom gave me one of those looks), but in this business you have to be able to see past the current color or style but instead see if the shape and detail are there. I got ahead of myself and started to sand them when I realized I hadn't taken a picture. They were originally all the yellow color. Here they are before.

They sat in the garage like this for a month or so (much to my husband's despair-he just loves projects sitting around) while I decided what to do with them. Well, a few weeks ago I purchased Annie Sloan's book on paint transformations using her chalk paint (not chalkboard paint-completely different). Lucky me, she had done a similar headboard and I loved it! The outside trim is painted in Old White and the center in Duck Egg Blue.

This paint is rather thick and I did use it full strength. In the future I think I will dilute it with water just a bit so it goes on smoother. As a result, this does have the hand painted look. I also distressed the headboards slightly, and covered them with a coat of Fiddes & Sons wax in Light (clear). Overall, I really like them and I wish my two girls would agree to put them in their room, but they just "aren't cool" for them right now. I disagree, but such is life. I can also imagine them in a guest room for when little guests come to visit, maybe over the holidays. With that lovely image of a cozy holiday with a house-full-of-guests in mind...I'm off to sleep.
Until next time,
Brandi

Tuesday, November 1, 2011

30 Days of Thankful

Simple as that. I will list some of the many things I am thankful for over the next 30 days. I will edit this post through the end of November.

Day 1: My children's love of reading. Such a simple, but important thing in our house.
Day 2: Sweatpants, cuddly blankets and comfort food (baby, it's cold outside!)

Day 3: My wonderful husband and the "me" time he encourages me to take in order to remain sane.
Love those few hours when I can get away and do whatever I please (which usually involves Michael's & Starbucks).
Day 4: Those rare moments when you catch your kids playing without being noticed.  
My two year old is very good at playing alone & I love to quietly watch her talking to her babies & making things up as she goes along, or my eight & nine year old dancing all crazy. So sweet and innocent.
Day 5: A change of pace. A change from your normal, daily routine.
Day 6: My perfectly imperfect family. Sometimes we're loud, we fight, we forget our manners...but it doesn't matter. We are together. We are healthy. And we love each other.
Day 7: The ability to change and grow. What if you reached a certain point and you could no longer change or grow. You couldn't improve, you couldn't lose or gain weight, you couldn't become a better person? How lucky we are, to be able to change the things we don't like about ourselves & our lives.
Day 8: Coupons. Today I am thankful for coupons, sales, deals, discounts, etc... We (my husband & I) often see who can find the best deals. The feeling of getting a great deal and rarely ever paying full price is, well, priceless.
Day 9: Electricity. We lost ours with the first snow of the season this morning. Not pleasant but thankfully, it was short lived.
Day 10: Good health. I take this for granted often, until I get sick or injured, then I remember how lucky I am to feel good 99% of the time.
Day 11: Sunshine. It's such a pick me up!
Day 12: Past & present military. I appreciate you all so very much, and all that you do for our country. You are all amazing. Thank you for preserving my freedom.
Day 13: Pictures. It's so much fun to look through them and reminisce and talk about family and friends.
Day 14: Forgiveness.  I hope you will forgive me for not keeping up this past week!
Day 15: My cell phone. That's all.

Day 16: Kids..all of them. So honest and sweet, they often bring you back to reality and re balance your perspective on things.
Day 17: My mommy. She's so talented, particularly with DIY, and always willing to help and teach me. Not to mention she is always, always there for any of us whenever we need it, and is a wonderful grandma to my kiddos. 
Day 18: Spray paint and Modge Podge. These two things are amazing. Love them! You will see why on the sheet music dresser that I will be showing you soon (idea from Miss Mustard Seed's blog).
Day 19: Sunday Funday. Probably not the traditional definition, but yesterday all of the family chipped in to help me get ready for my upcoming show. It was fun.
Day 20: Unexpected quality time. Related to the previous one, my daughter asked if she could help with some of my projects. Now usually, I admit, I'm anal and don't really want "help" on painting projects, however, this was just the primer so I thought it would be fun to let my middle child help. Not only did she do an awesome job but it gave us some time together AND I got to teach her some things about painting and DIY. Priceless.
Day 21: My amazing, handsome husband. Sorry ladies, I took the perfect one.. and no, you can't have him. Na-na-na-na-na-na. Really, I'm not sorry. Just happy and thankful that he's mine. :) 
Day 22: The US of A. I often think of how lucky we are to be able to walk outside without fear of being shot or bombed. I'm not afraid to send me kids to school for fear of getting caught in the cross-fire of a war outside my door. It may not be perfect, but I wouldn't want to live anywhere else (ok, maybe Italy or France wouldn't be torture either). 
Day 23: "Do nothing" time.  So nice, even if rare.
Day 24: Eating everything you see without guilt day. Happy Thanksgiving everyone!
Day 25: Family get togethers. Fun to hang out and catch up.
Day 26: Music. It can completely change my mood, provide an outlet and even confirm that I'm not the only one who faces challenges.
Day 27: Sleep. Oh how I love my sleep. Mmmmm....   
Day 28: Exercise. Never thought I would say that but it does make me feel more confident and helps to relieve stress. It's just getting to the gym that presents the problem. :)
Day 29: My Birthday. It's coming right up. I can't say that I love getting older, but isn't it so much fun to have a day out of the year that's all yours? Plus, you get away with a lot more (or doing a lot less, in my case). 
Day 30: You. It's true. I love my friends, family and even the others that I've never met that support me throughout my ventures. You provide support and encouragement when I'm feeling frustrated or down. Thank you so much! I hope that I can provide you with some ideas, inspiration or just a little comic relief from time to time.

I am also doing this activity with the kids, and trying to remind them of just how many things we have to be thankful for.
What are you thankful for and do you have any traditions that celebrate it?

Monday, October 31, 2011

In the Very Beginning

Happy Halloween! I hope you had a great weekend! 

While visiting family this weekend I spied my very first painting project; a painted sign that I made for the gift exchange at my husband's family Christmas last year. While driving home I thought about how ironic it was that the saying on the sign is "With God all things are possible." Fast forward to today and though this "hobby" isn't where I would like it to be yet, I have come a long way, and I have a feeling He had something to do with it.

After looking through some of the pictures of my first renovations, I thought I would post some of the before and after pictures. These were completed before I started my blog, therefore, I will apologize in advance, but there won't be much in the way of tutorials..or quality pictures. (I hadn't even begun to think about those yet!)

The first project I referred to above was made out of an old cabinet door that I found at the Habitat for Humanity Restore. I painted it white, distressed it and actually used a dollar store cling and some spray adhesive to secure the wording.                 
Before
After

Now on to some projects that followed. It will primarily be pictures (only) but I will try to fill in the blanks when I can.

Before
Coffee table that was very, very dirty. Used bleach water to clean it. Decided to turn it into a bench.
After
(with an expert upholstery instructor-my mom)
Before
Veneer Buffet-wanted to keep the wood top but paint the rest Heirloom White. I used wood putty to patch any chips on the base and tore off, and refinished the laminate on top (my first experience with laminate!)

After


 Before
Cute little desk but wanted a light blue, shabby chic look. The blue was a mistint so I don't know the color, but it was antiqued and handles were sprayed Oil Rubbed Bronze.
During

 After
Before
Ugly estate sale lamp $5

After
Base painted black and shade was covered with fabric, glued on with spray adhesive.

Before
Coffee table with pretty design on top
After
Bottom was painted black & distressed, the top was left as is
(poor picture of the whole piece, sorry)

Ok, so that's it for tonight. I have more but don't want to overload you. 
This was my beginning, but certainly not the end. There is so much more to come and I hope to grow and improve with each project.

You can also view this project, and many others, on Miss Mustard Seed's blog. She is the queen of furniture makeovers and interior design. You won't be disappointed with your visit!